This guide shows how to set up eClose, create a closing package with an eNote, and send it for signing from the EPC UI, with screenshots for each step.
Step 1: Open the loan in Encompass and go to All Services.
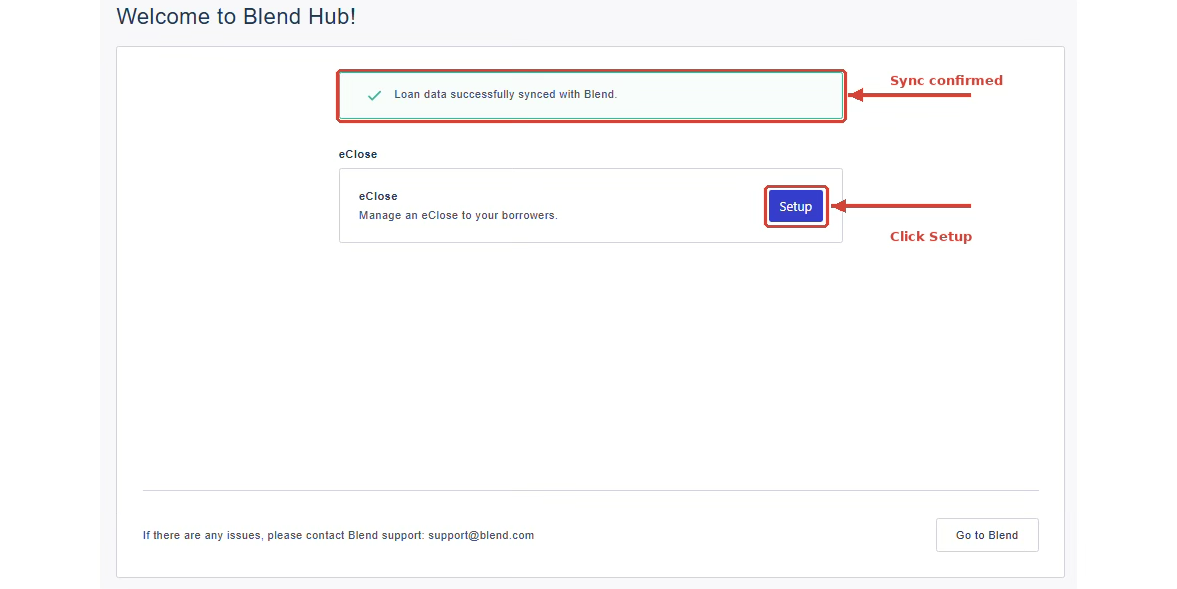
Step 2: On the Welcome to Blend Hub screen, click Setup next to eClose to start the eClose setup. A green banner confirms “Loan data successfully synced with Blend” before you continue.
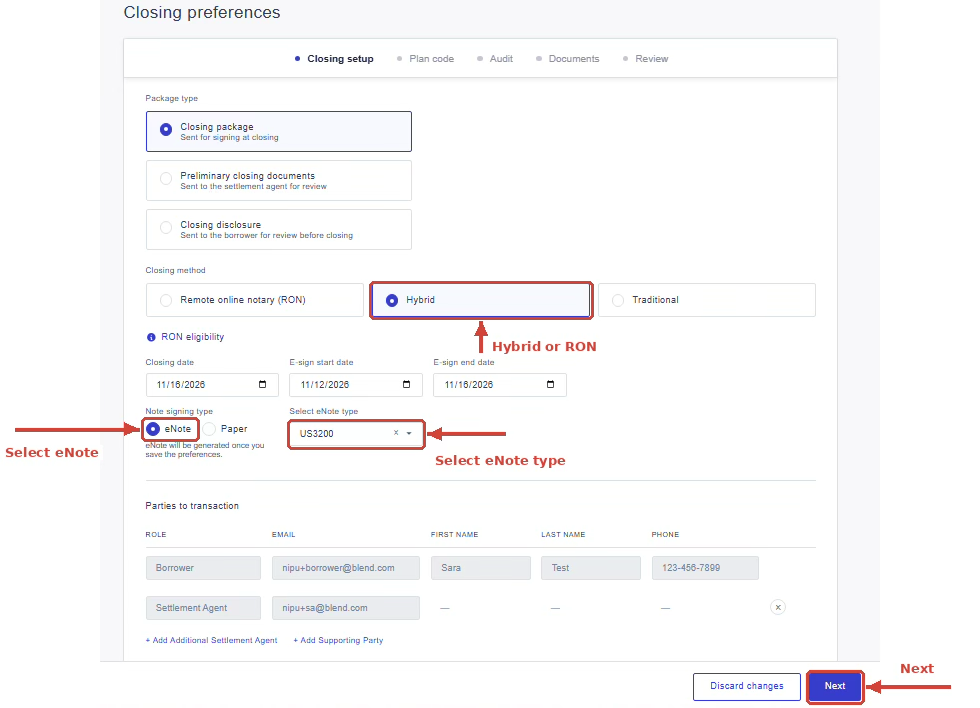
Step 3: The Closing preferences screen appears. Update the closing configuration as needed (Hybrid or RON). Under Note signing type, select eNote, then select the required eNote type. When you have finished adding the details, click Next.
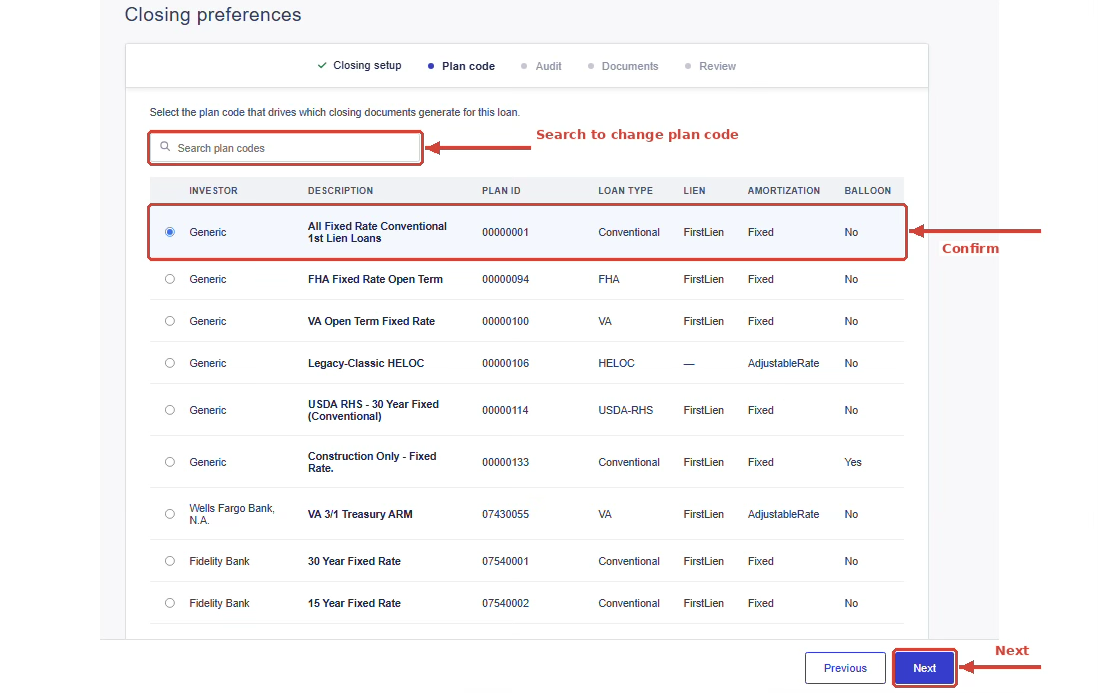
Step 4: You are redirected to the Plan code step of the Closing preferences screen. Confirm the plan code, and change it if necessary. Then click Next. (Note: This step may not appear if the plan code has already been inputted. It will only appear if the plan code has not yet been inputted.)
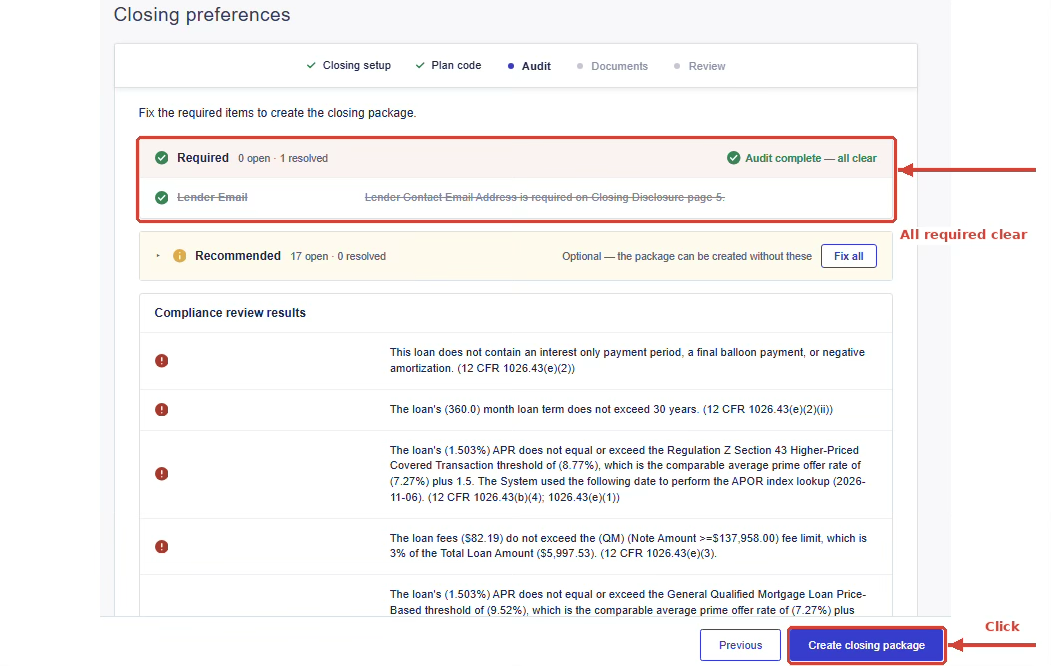
Step 5: On the Audit step, resolve all required issues, then click Create closing package. Recommended items are optional, and the package can be created without them.
Step 6: On the Documents step, confirm that the correct documents were generated. Then click Next.
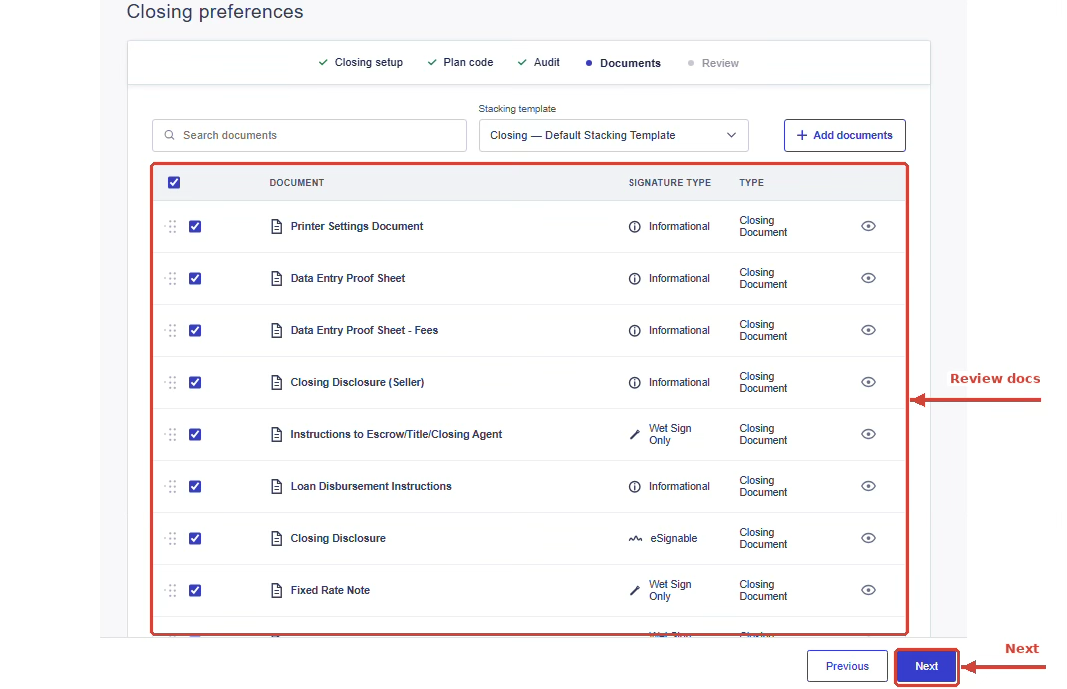
Step 7: Review the final package details before sending. When everything looks correct, click Send for signing.
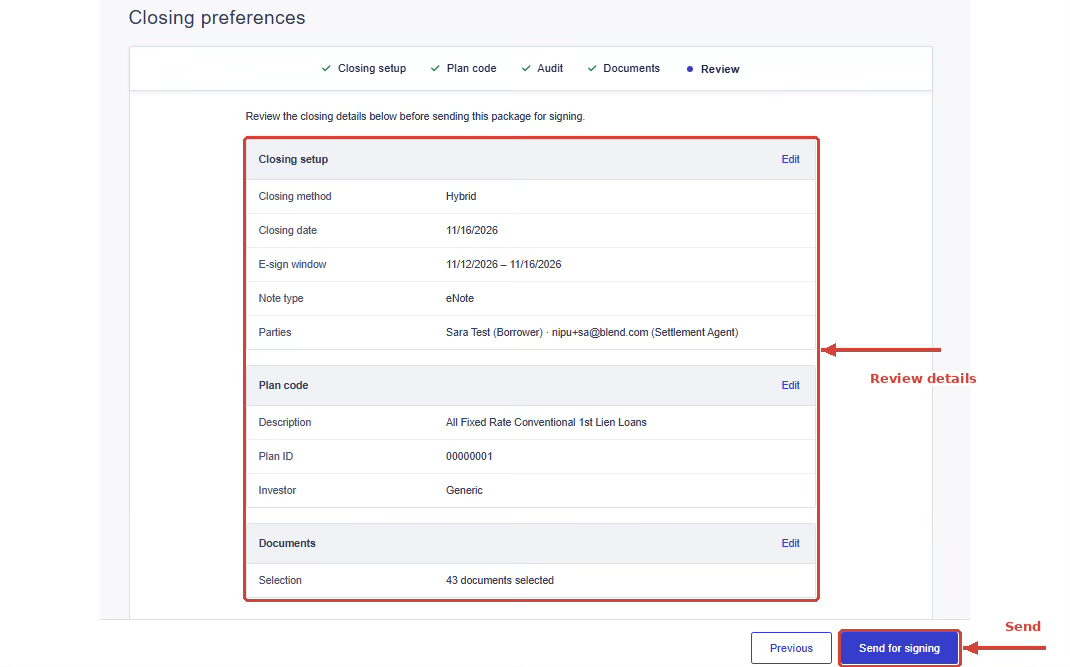
Step 8: Wait for the submission to finish, and confirm that the package was accepted.
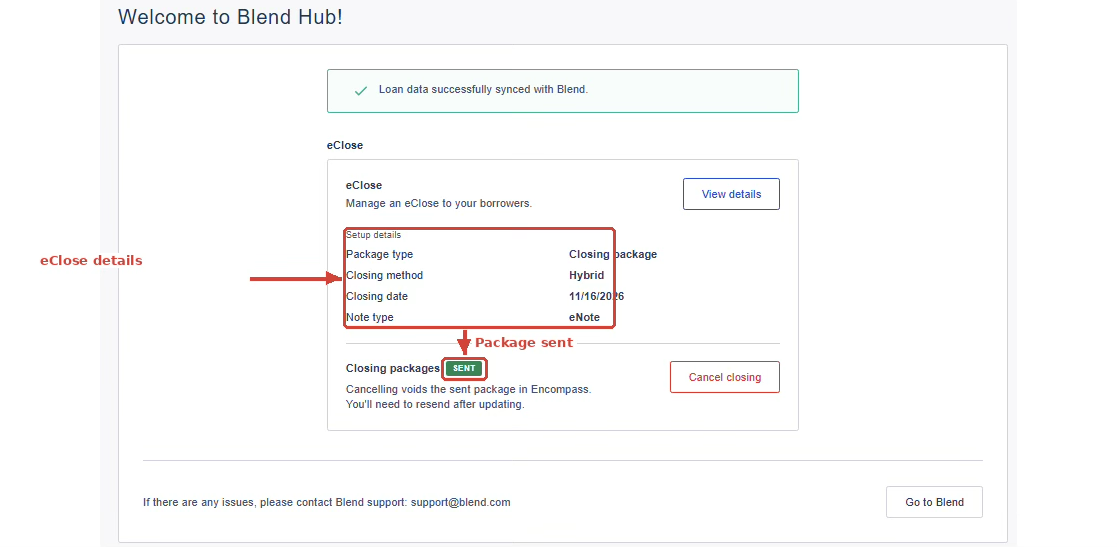
Step 9: You are taken to the Blend Hub page, which now shows the eClose details. The closing package appears with a Sent status.
Was this article helpful?
That’s Great!
Thank you for your feedback
Sorry! We couldn't be helpful
Thank you for your feedback
Feedback sent
We appreciate your effort and will try to fix the article