This guide shows how to send a preliminary closing package to Blend from the Encompass (EPC) UI. You order the Blend service, push the loan, set up eClose, then work through the Closing preferences screens and send the package for signing.
If the eClose setup is already complete, please skip Stage 1 and 2 and proceed directly to Stage 3
Stage 1: Order the service in Encompass
Open the loan's Services page and order the Blend document preparation service.
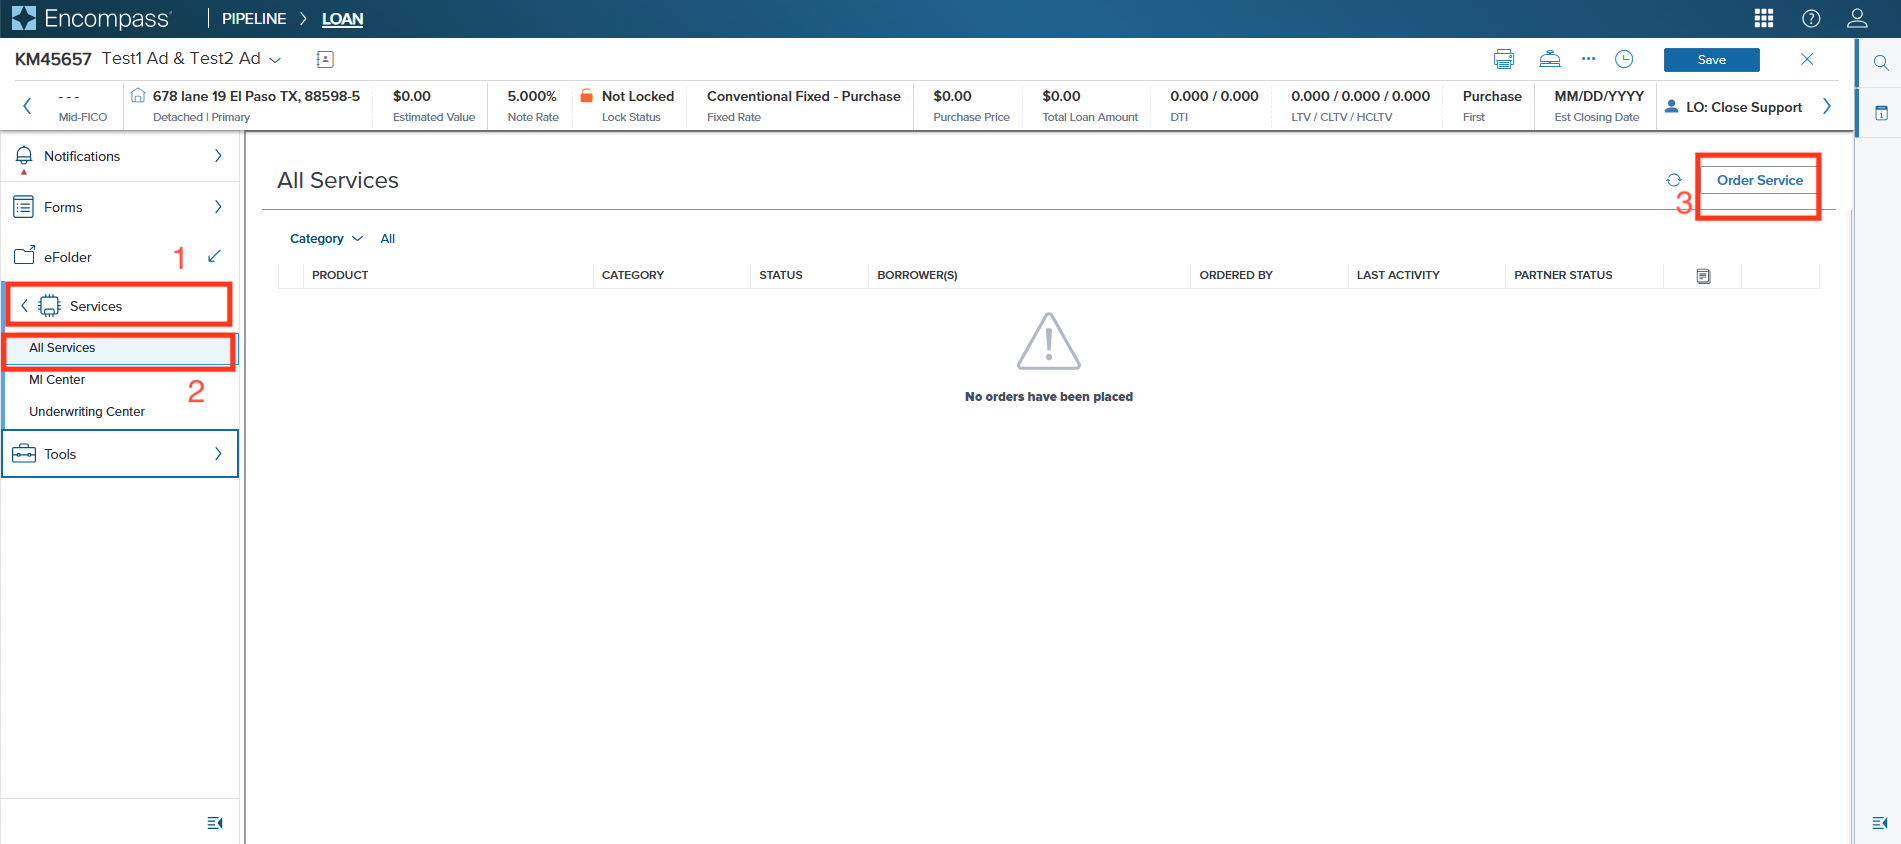
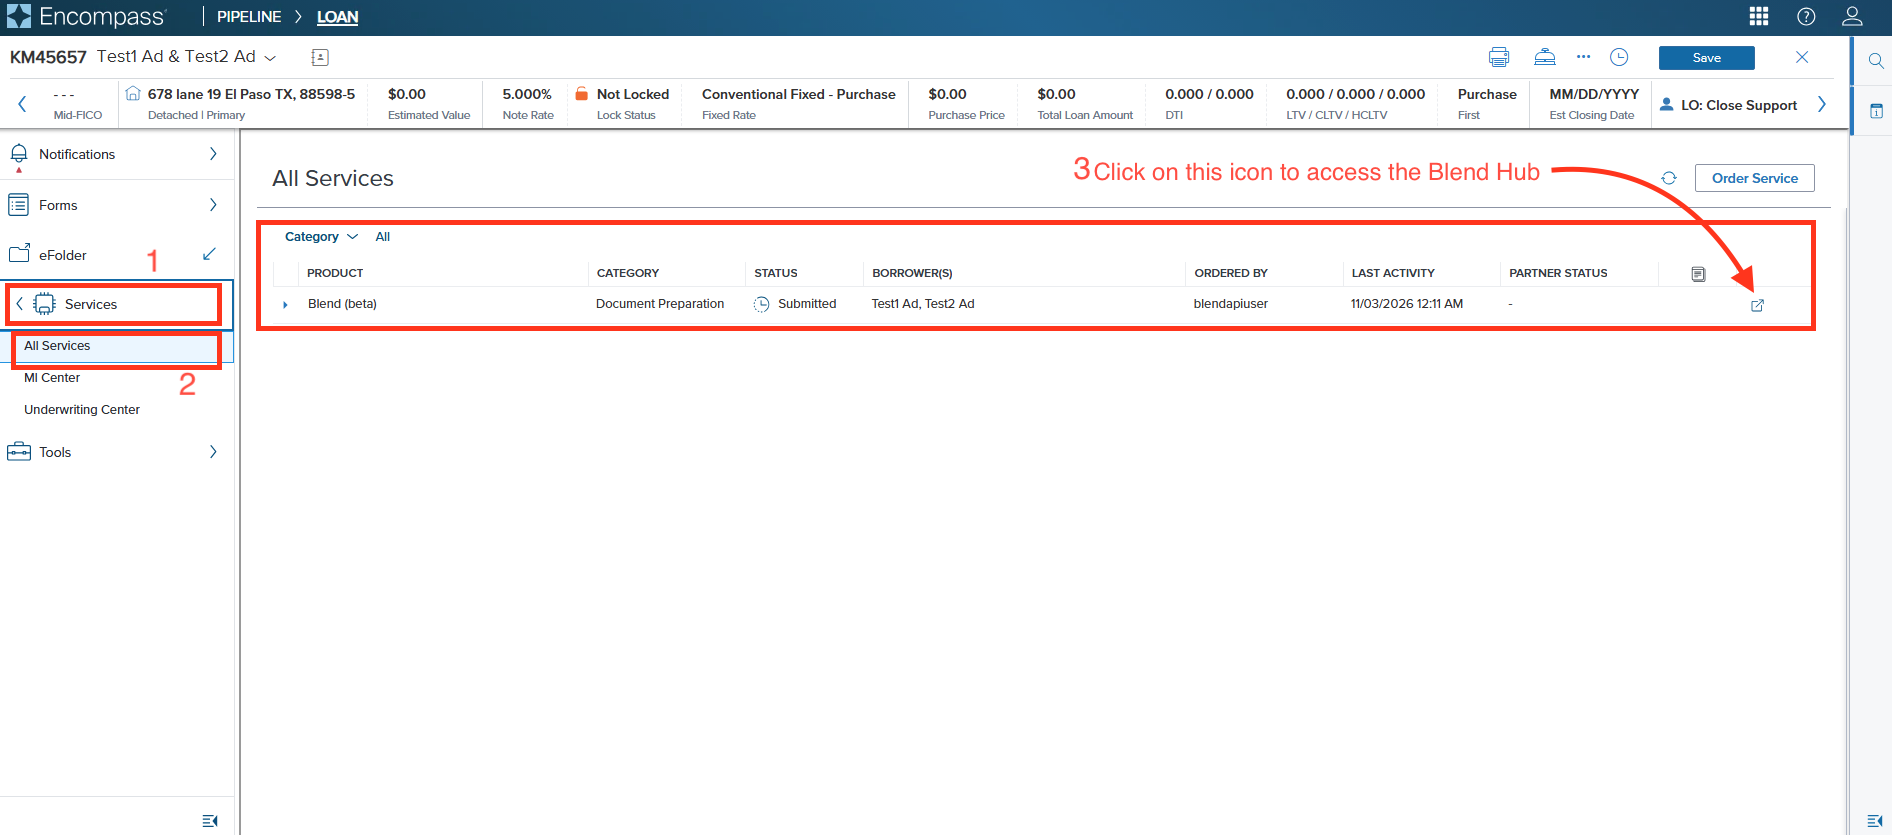
Click Services in the left-hand menu.
Click All Services.
Click Order Service at the top right corner of the All Services page.
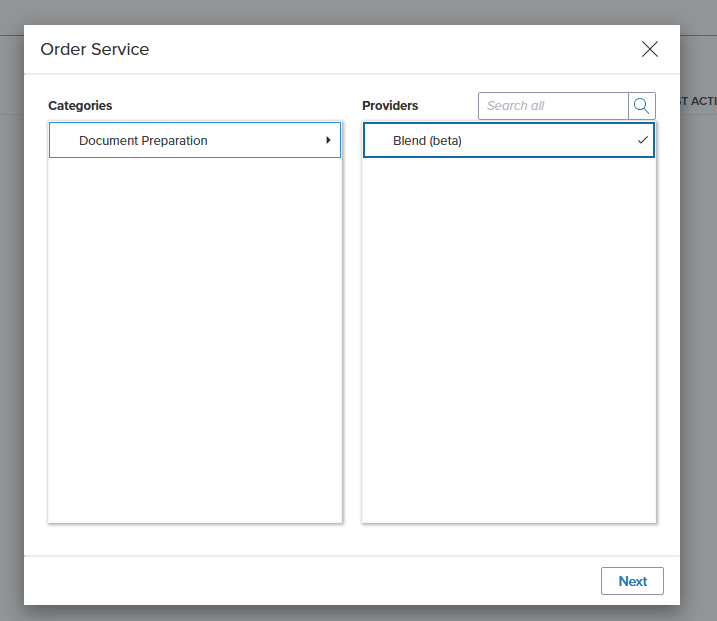
In the Order Service pop-up, click Document Preparation under Categories, then select Blend (beta) under Providers and click Next.
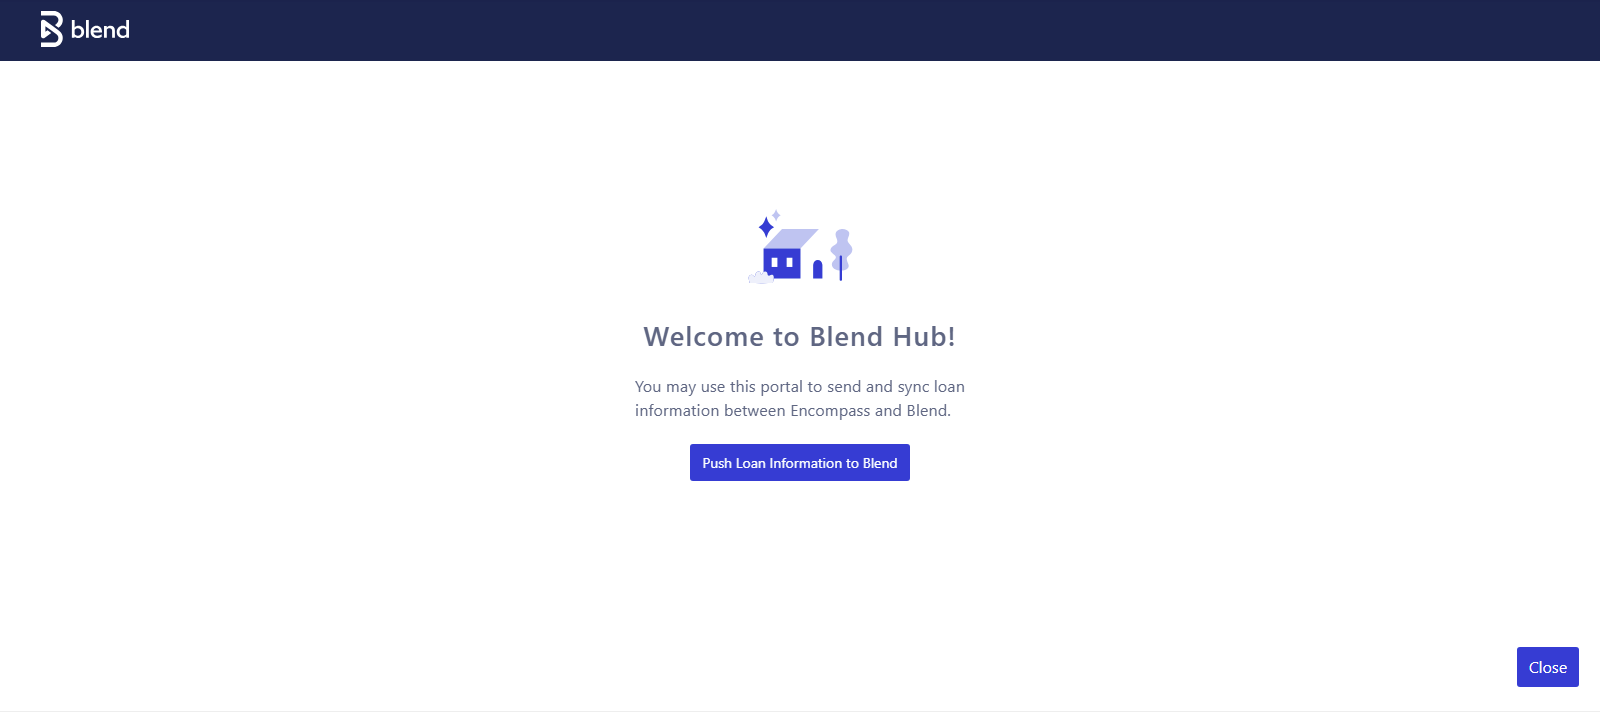
The Blend Hub opens next. Push the loan data across, then start the eClose setup.
Stage 2: Push the loan to Blend and set up eCloseOn the Welcome to Blend Hub screen, click Push Loan Information to Blend
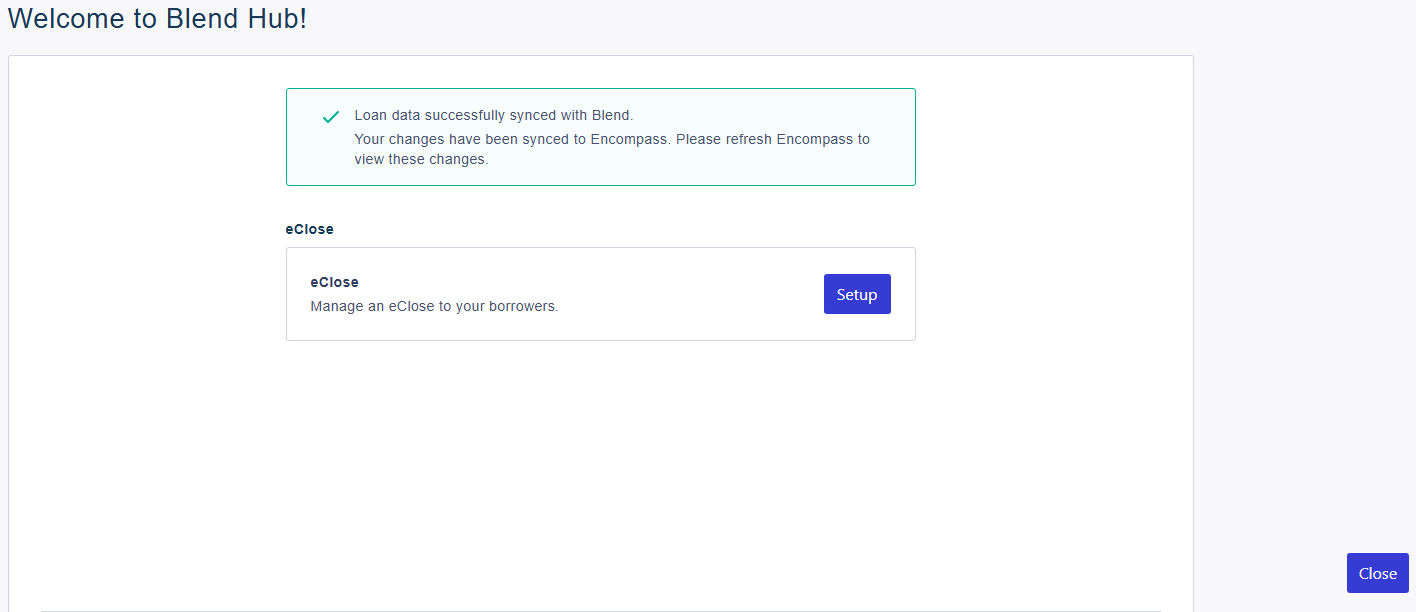
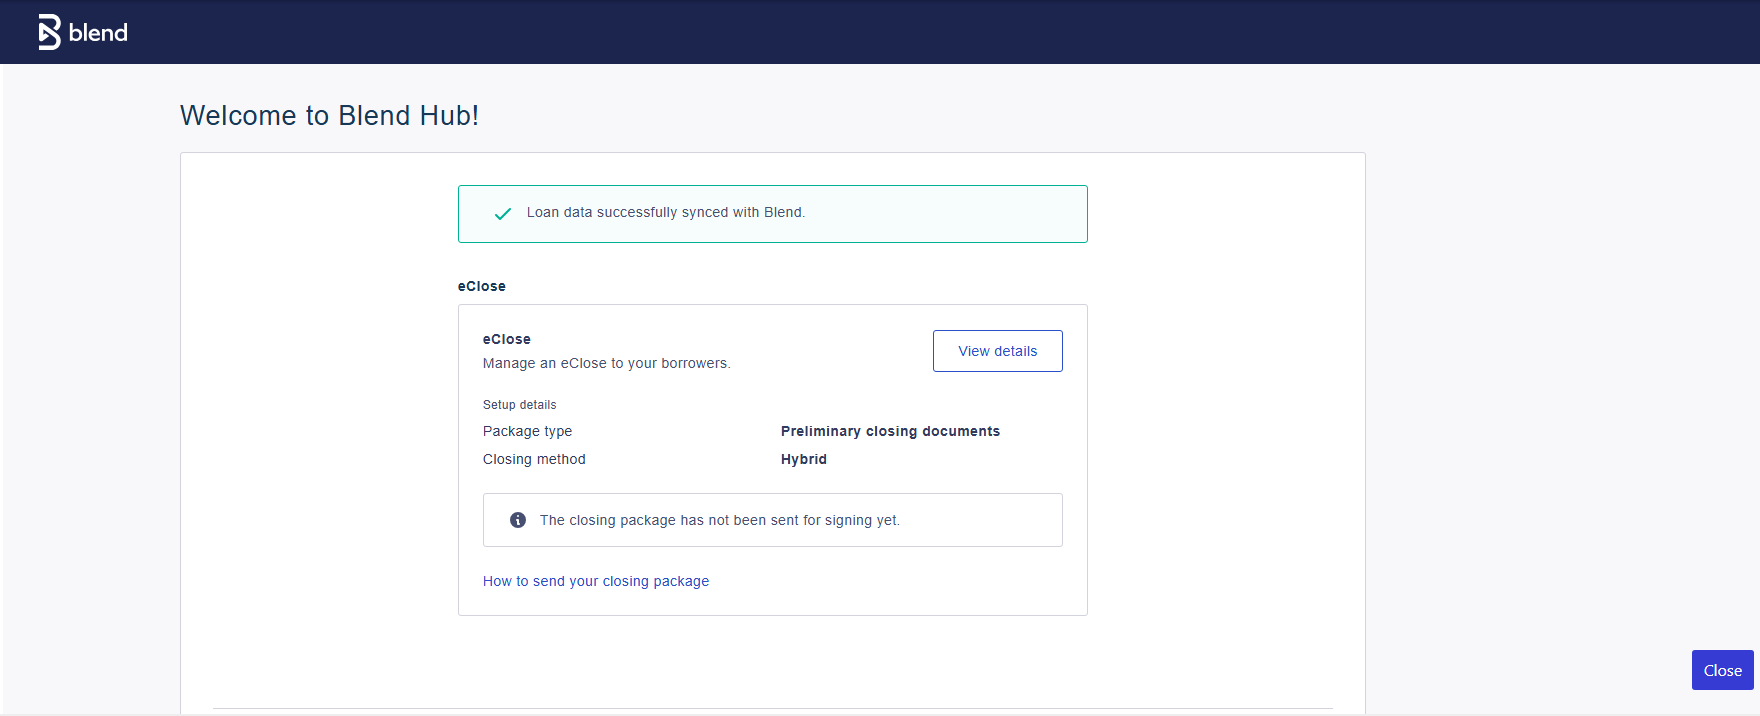
Click Setup next to eClose to start the eClose setup. A green banner confirms "Loan data successfully synced with Blend" before you continue.
NOTE: Please start from Step 4 of Stage 3 after completing Stage 1 and 2Stage 3: Complete Closing preferences and send for signing
The Closing preferences screen has five steps along the top: Closing setup, Plan code, Audit, Documents, and Review. Work through them in order.Click All Services, from Services in the left-hand menu
To access the Blend Hub, click the “external link” icon under Category
Click on “View Details” to access the closing preference screen
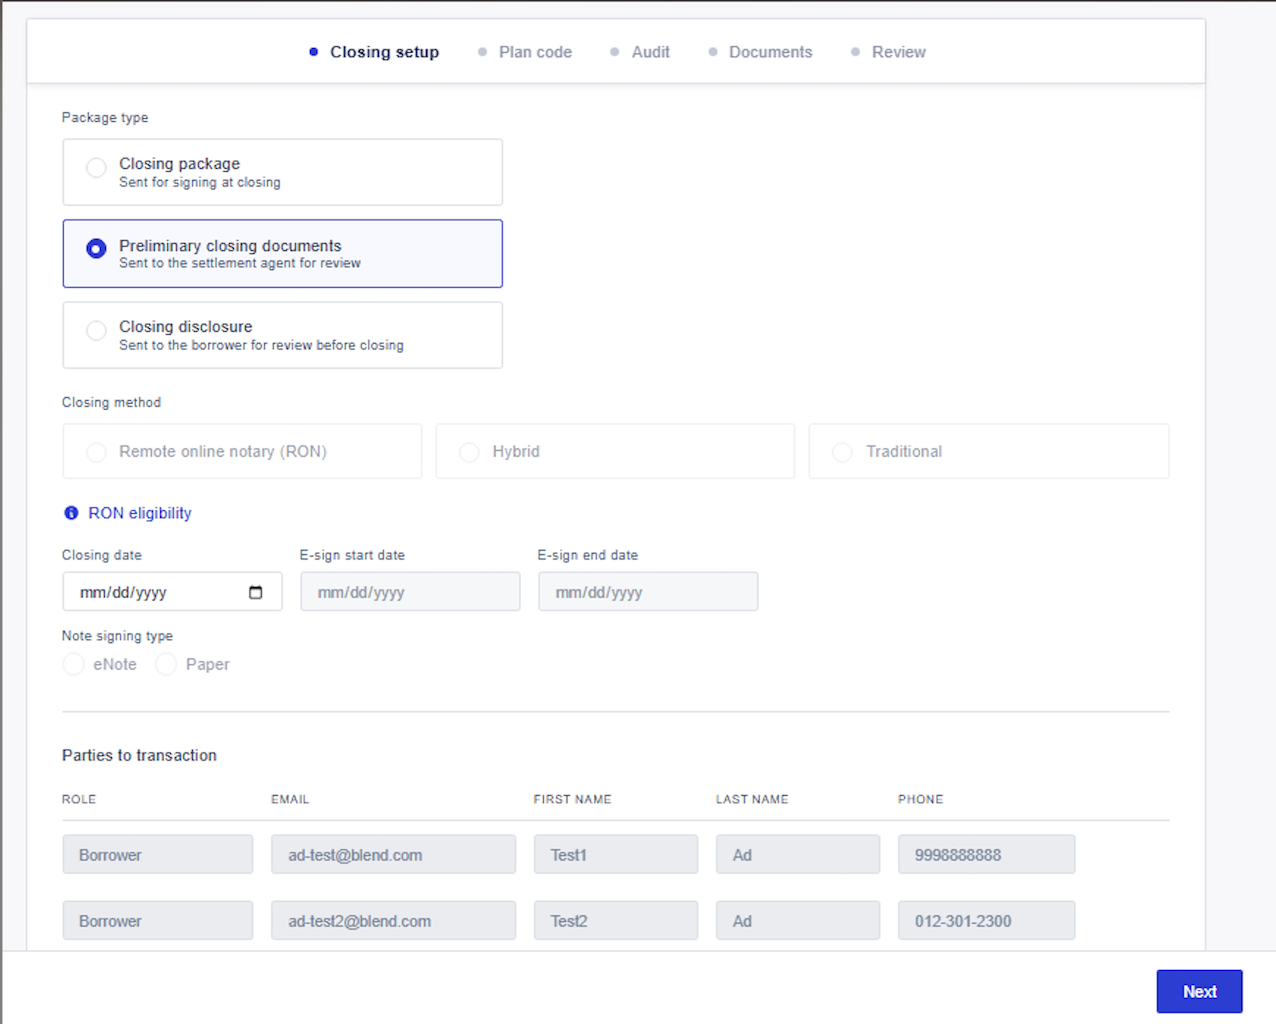
Closing setup: under Package type, select Preliminary closing documents (sent to the settlement agent for review), then click Next.
Plan code: select the plan code that drives which closing documents generate for this loan, then click Next.
If the plan code is already inputted, this step may not appear. This will only appear if plan code has not been inputted.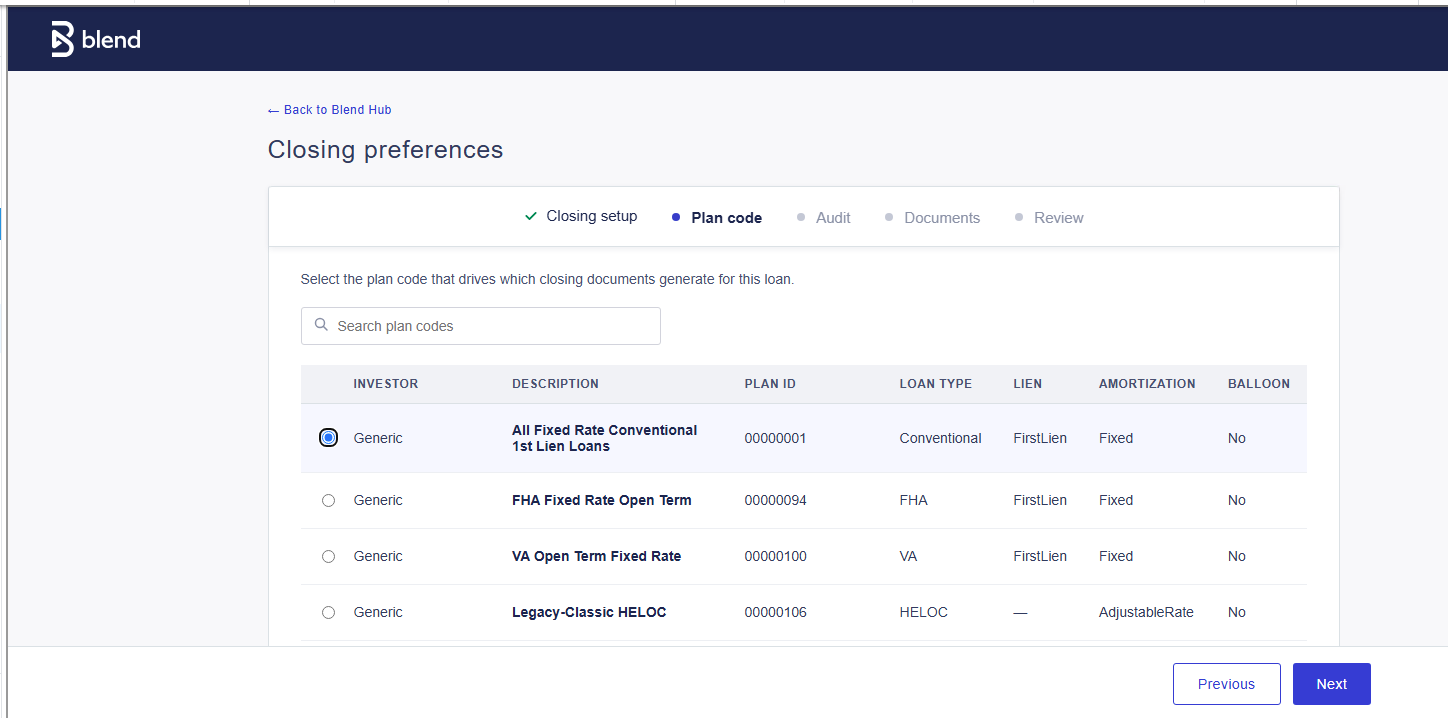
Audit: the required items must be resolved before the package can be created.
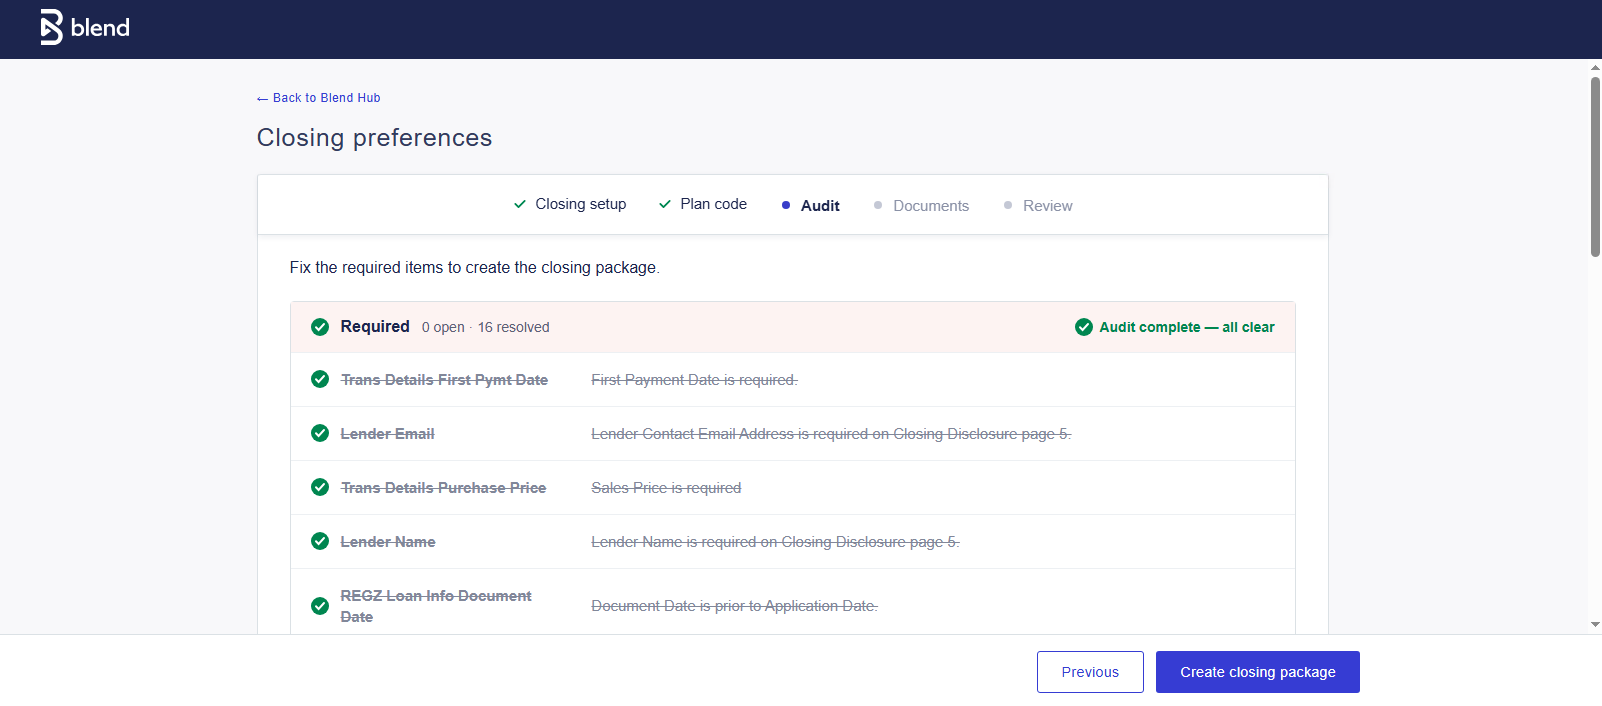
*Click Fix all if required, or use Fix field on each item.
*When the banner reads "Audit complete, all clear", click Create closing package.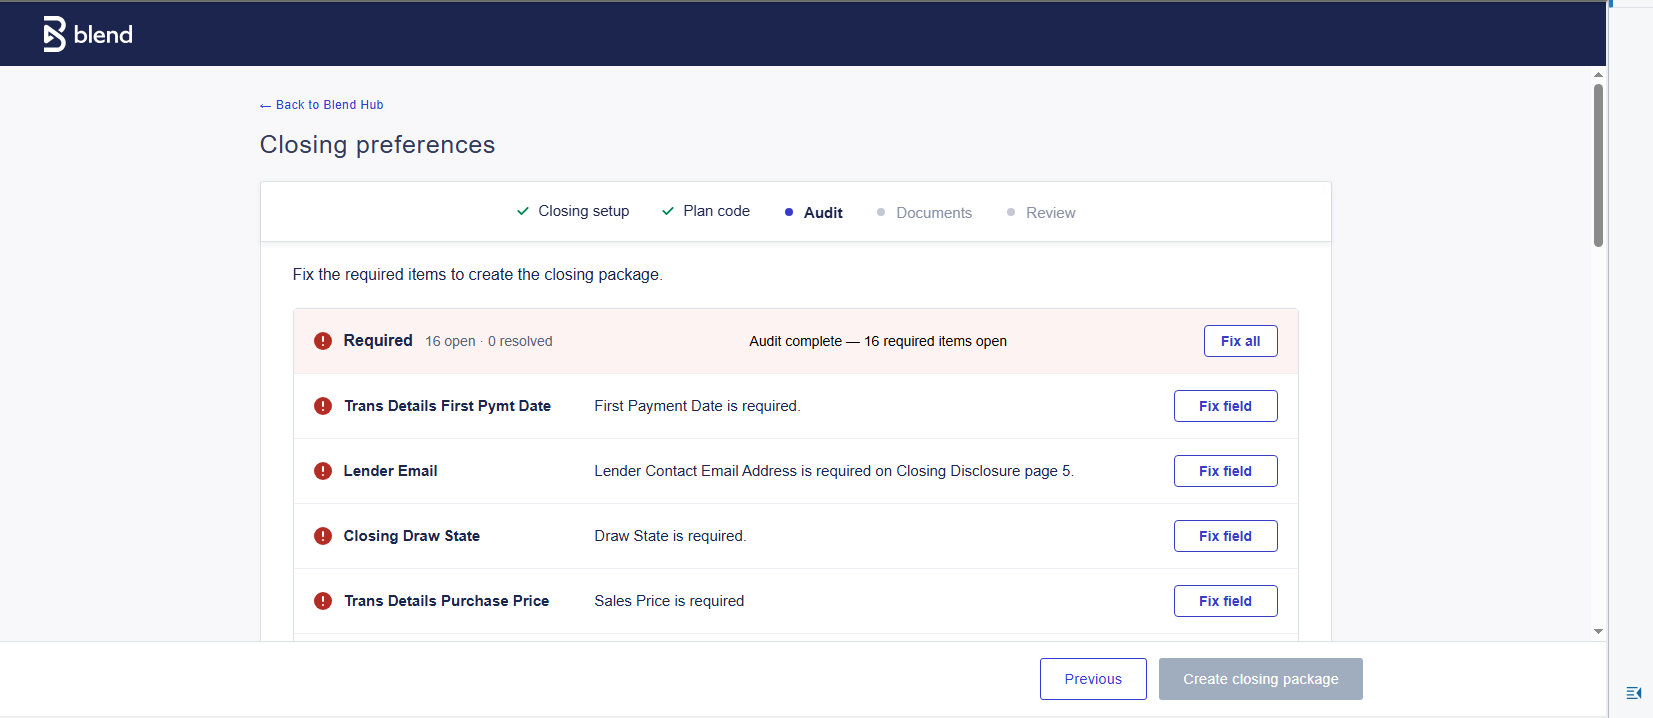
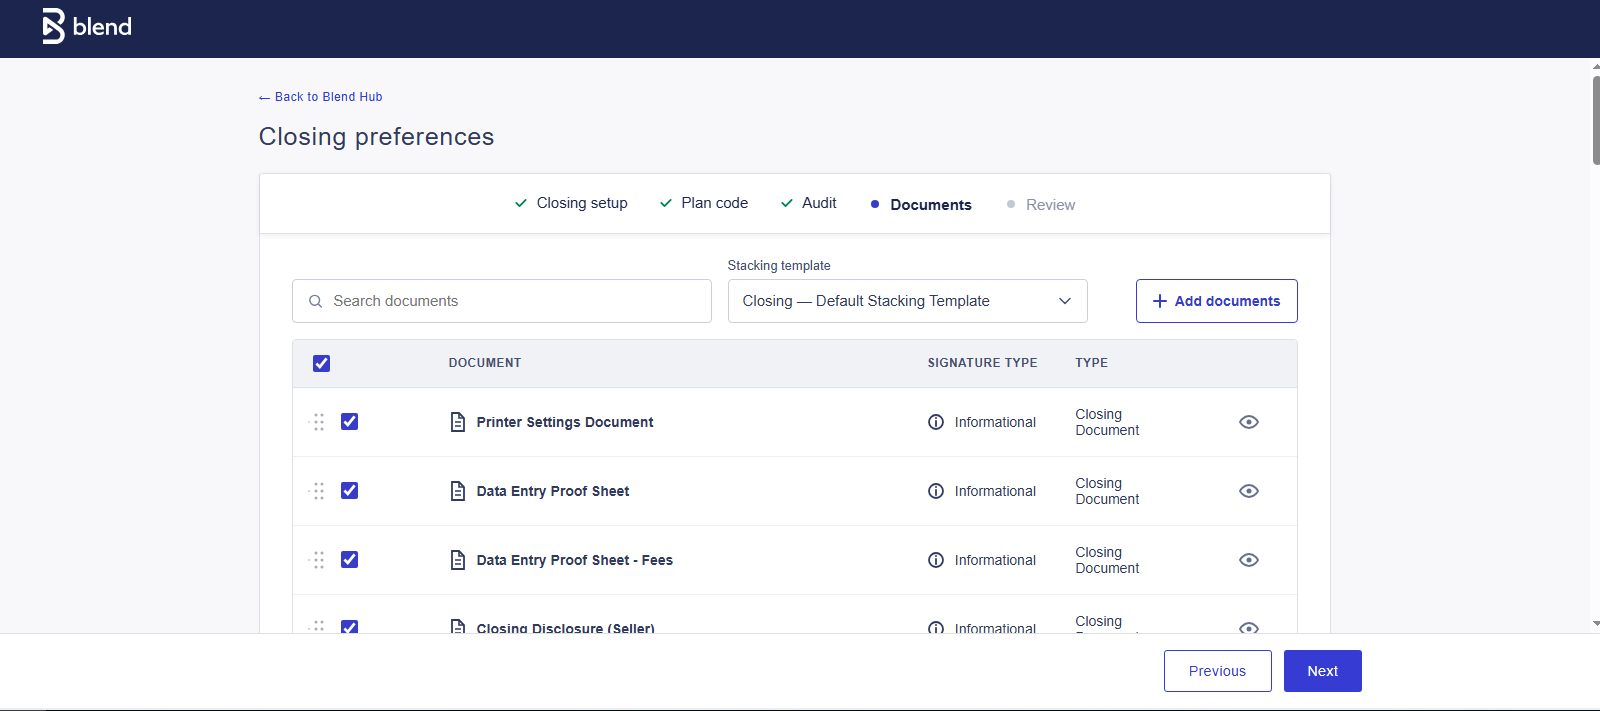
Documents: review the documents generated, then click Next.
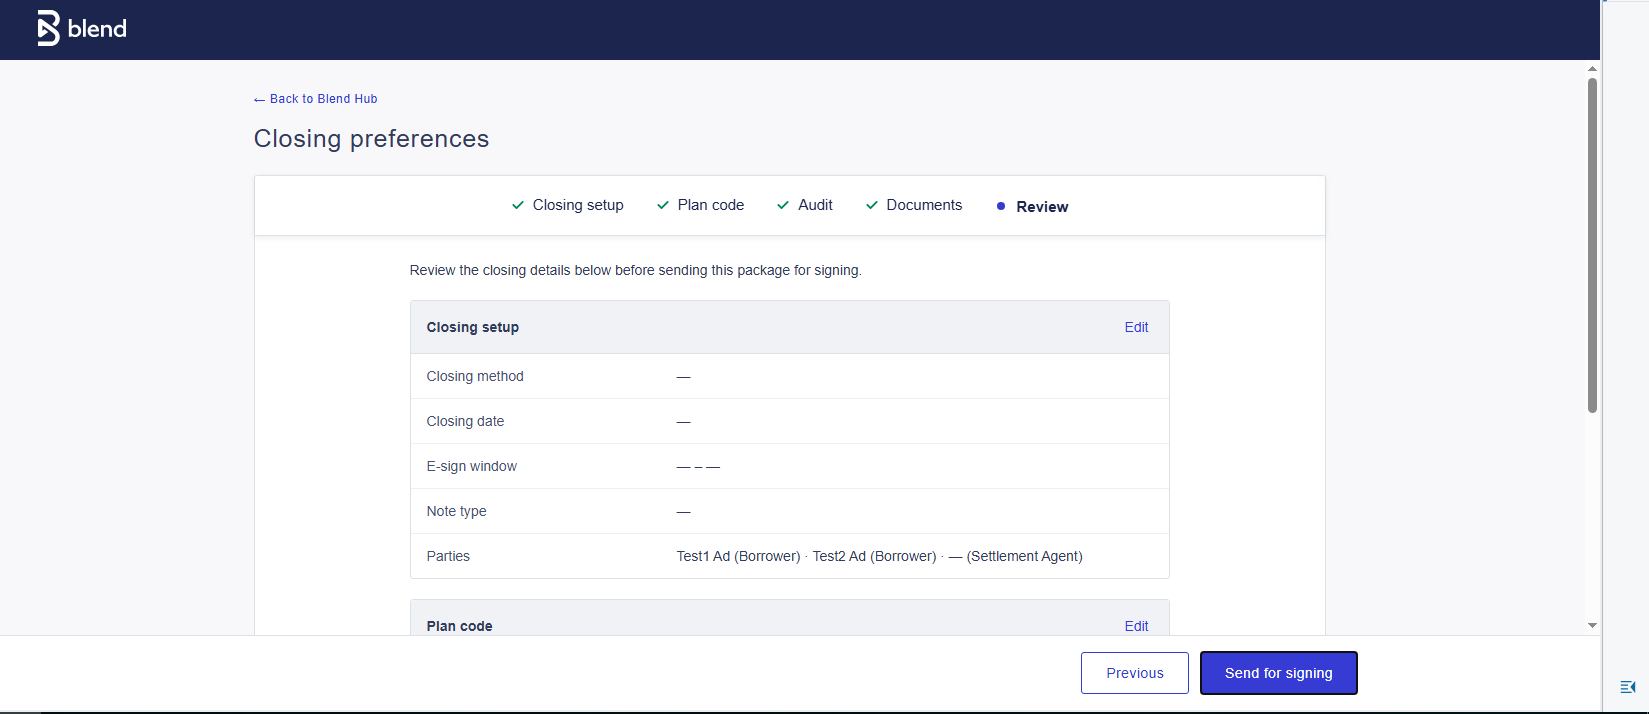
Review: check all the information, then click Send for signing
If you have any questions or concerns regarding the preliminary package, please do not hesitate to reach out to Close Support at support@blendclose.com.
Was this article helpful?
That’s Great!
Thank you for your feedback
Sorry! We couldn't be helpful
Thank you for your feedback
Feedback sent
We appreciate your effort and will try to fix the article