Sending Closing Package through EPC Web Services
Use this guide to prepare and send a full closing package from Encompass through EPC for borrower and settlement-agent signing.
Screenshots are illustrative; sample dates and loan-specific details have been obscured.
Before you begin
- Confirm the loan is ready for closing and that you are working in the correct Encompass instance.
- Confirm EPC ordering is enabled for your lender or tenant. Available ordering options can vary by configuration.
- Verify the closing date, closing method, borrower and other signing parties, and settlement-agent details in Encompass.
- Use the lender-approved plan code for the full closing package. Do not use a test or unapproved plan code for a live closing.
1. Open EPC from Encompass
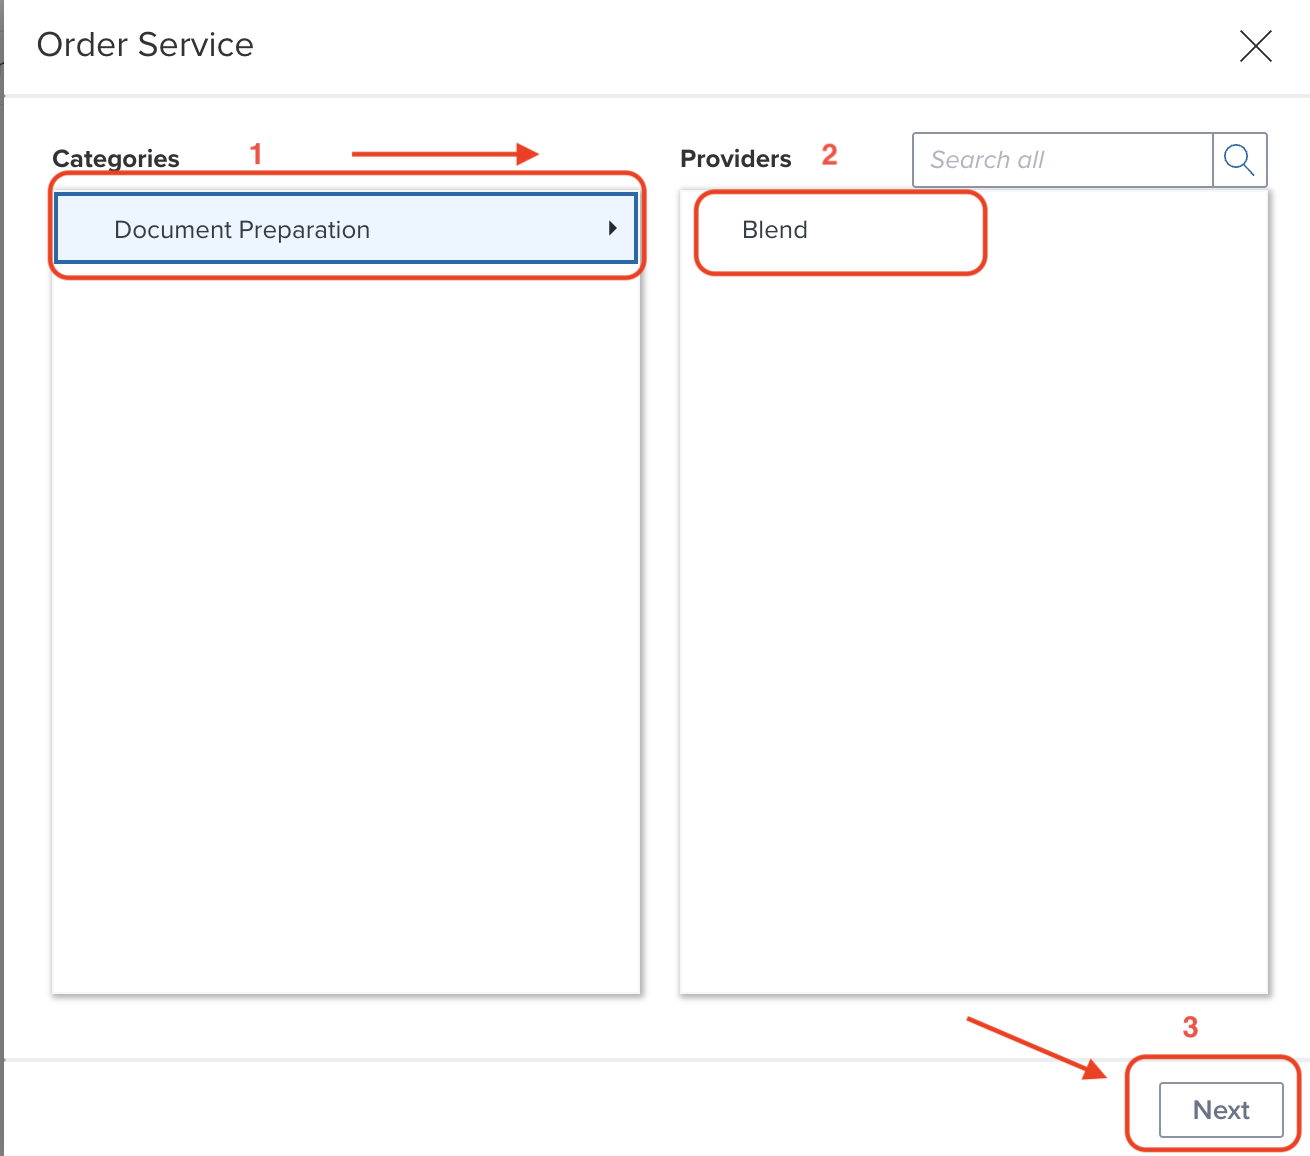
- Open the loan in Encompass and go to Services > All Services.
- Select Order Service (or the service arrow), then choose Document Preparation – Blend.
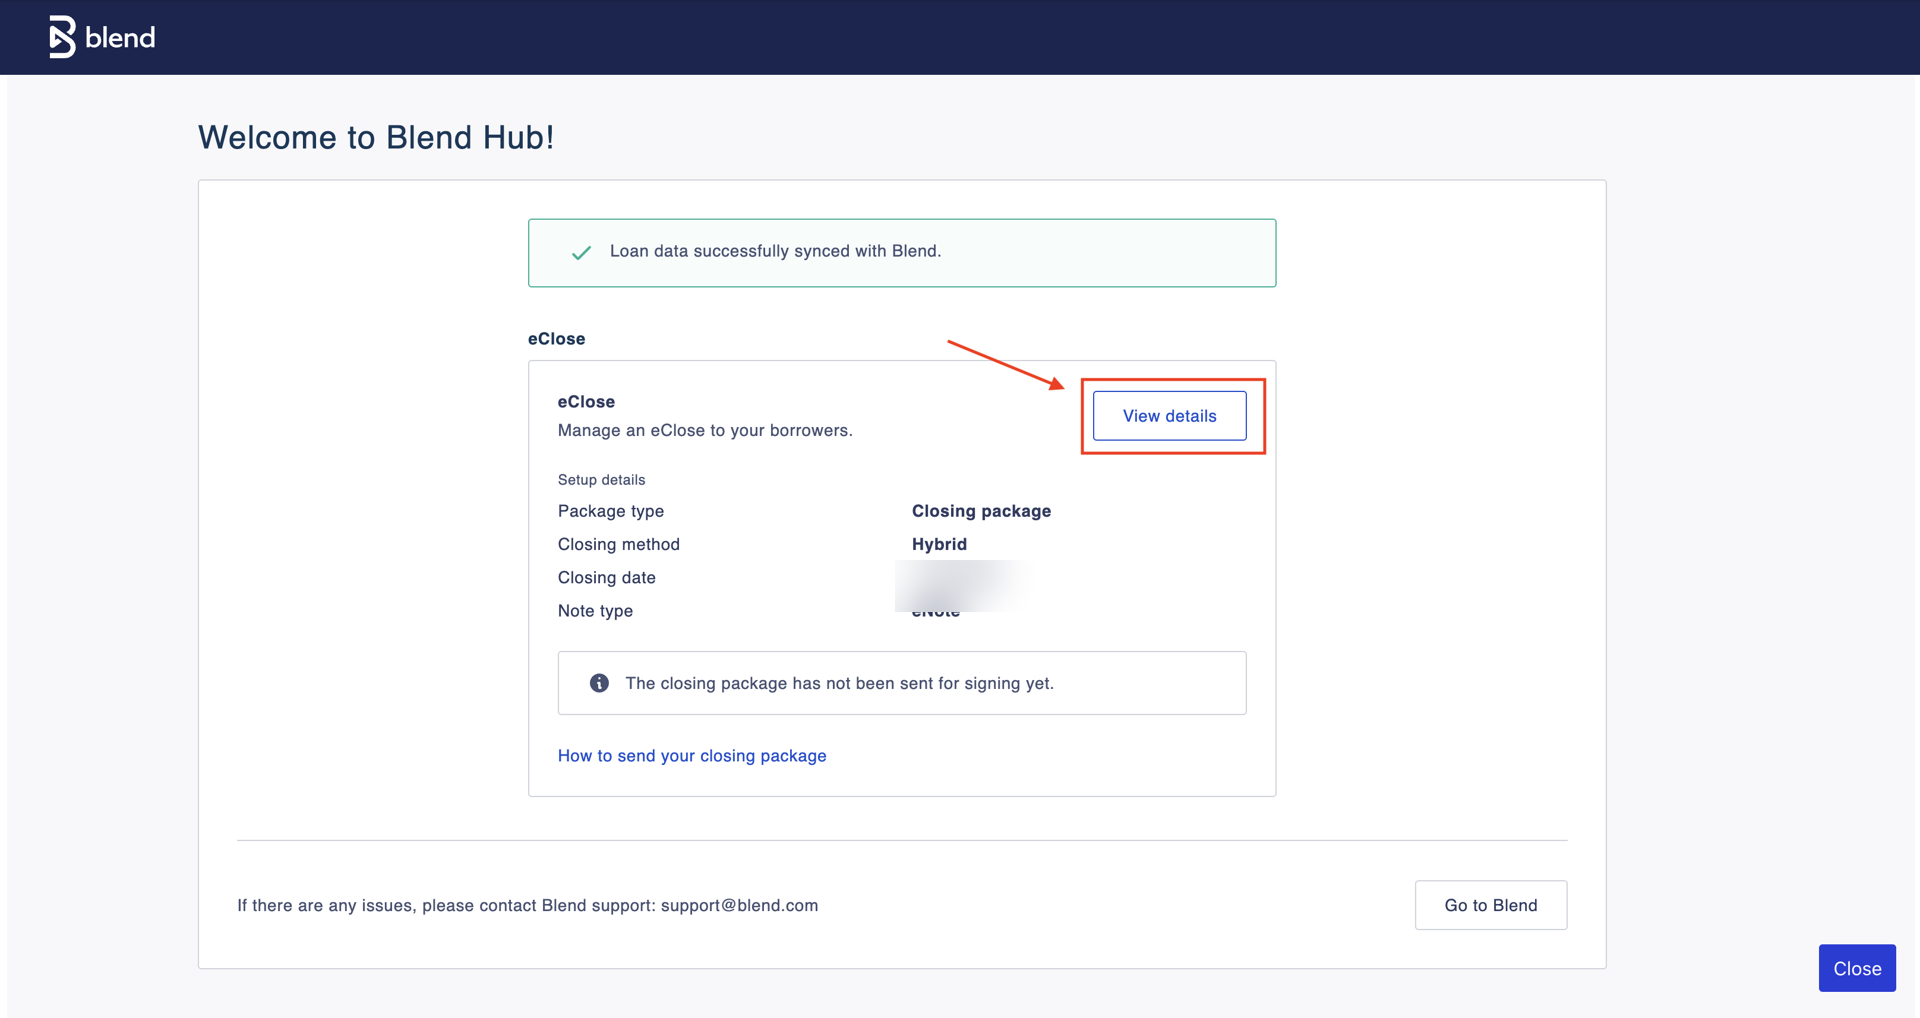
- Select Next to open EPC, then choose View Details to continue.
2. Set up the closing package
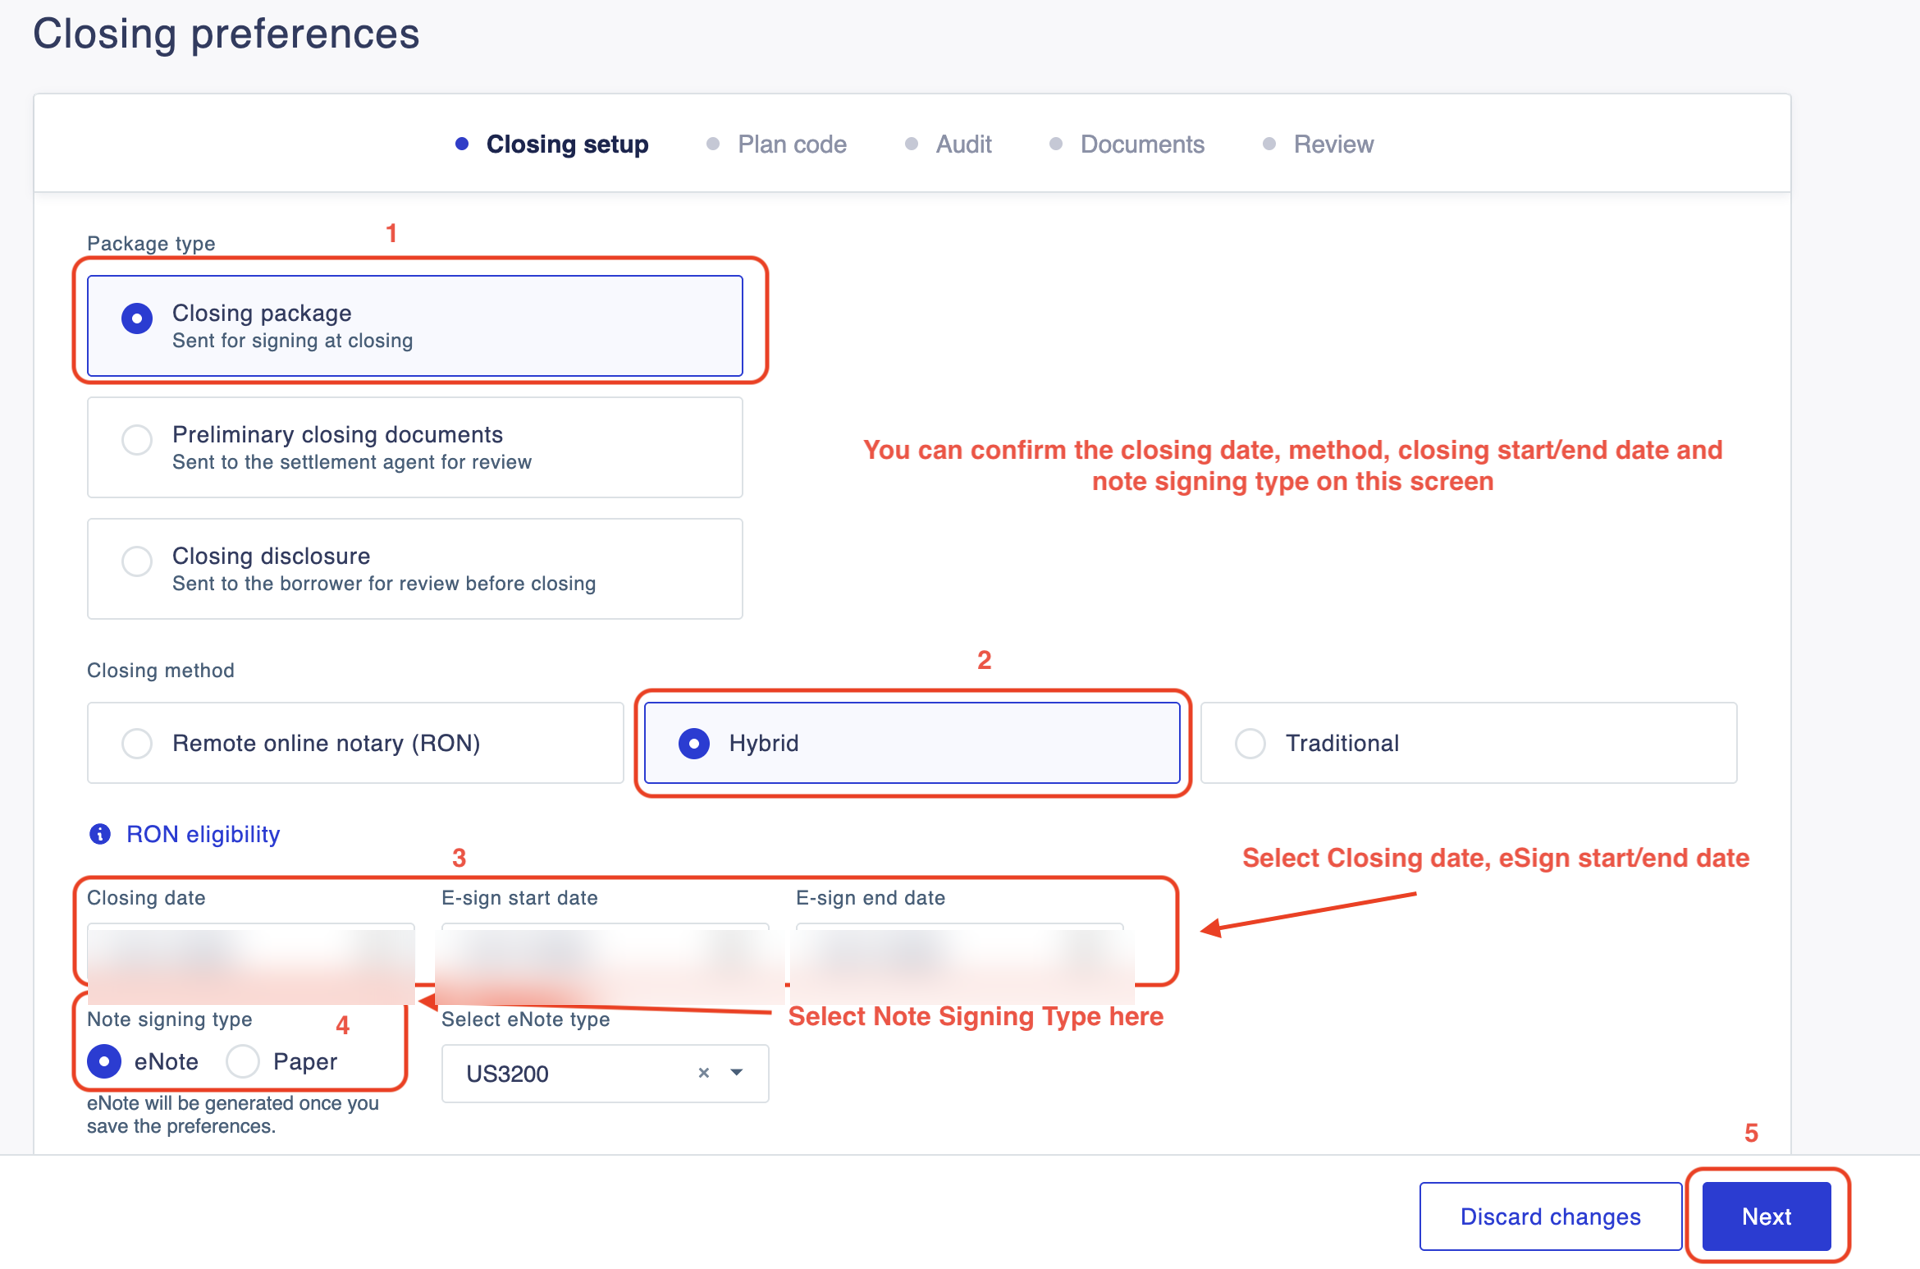
- In EPC, select Closing Package as the package type.
- Confirm the closing date, closing method, and parties.
- Complete the required settlement-agent fields.
- Confirm the lender-approved plan code is present. If the plan code is not prefilled or you are unsure which code to use, follow your lender’s process before continuing.
3. Run and resolve the audit
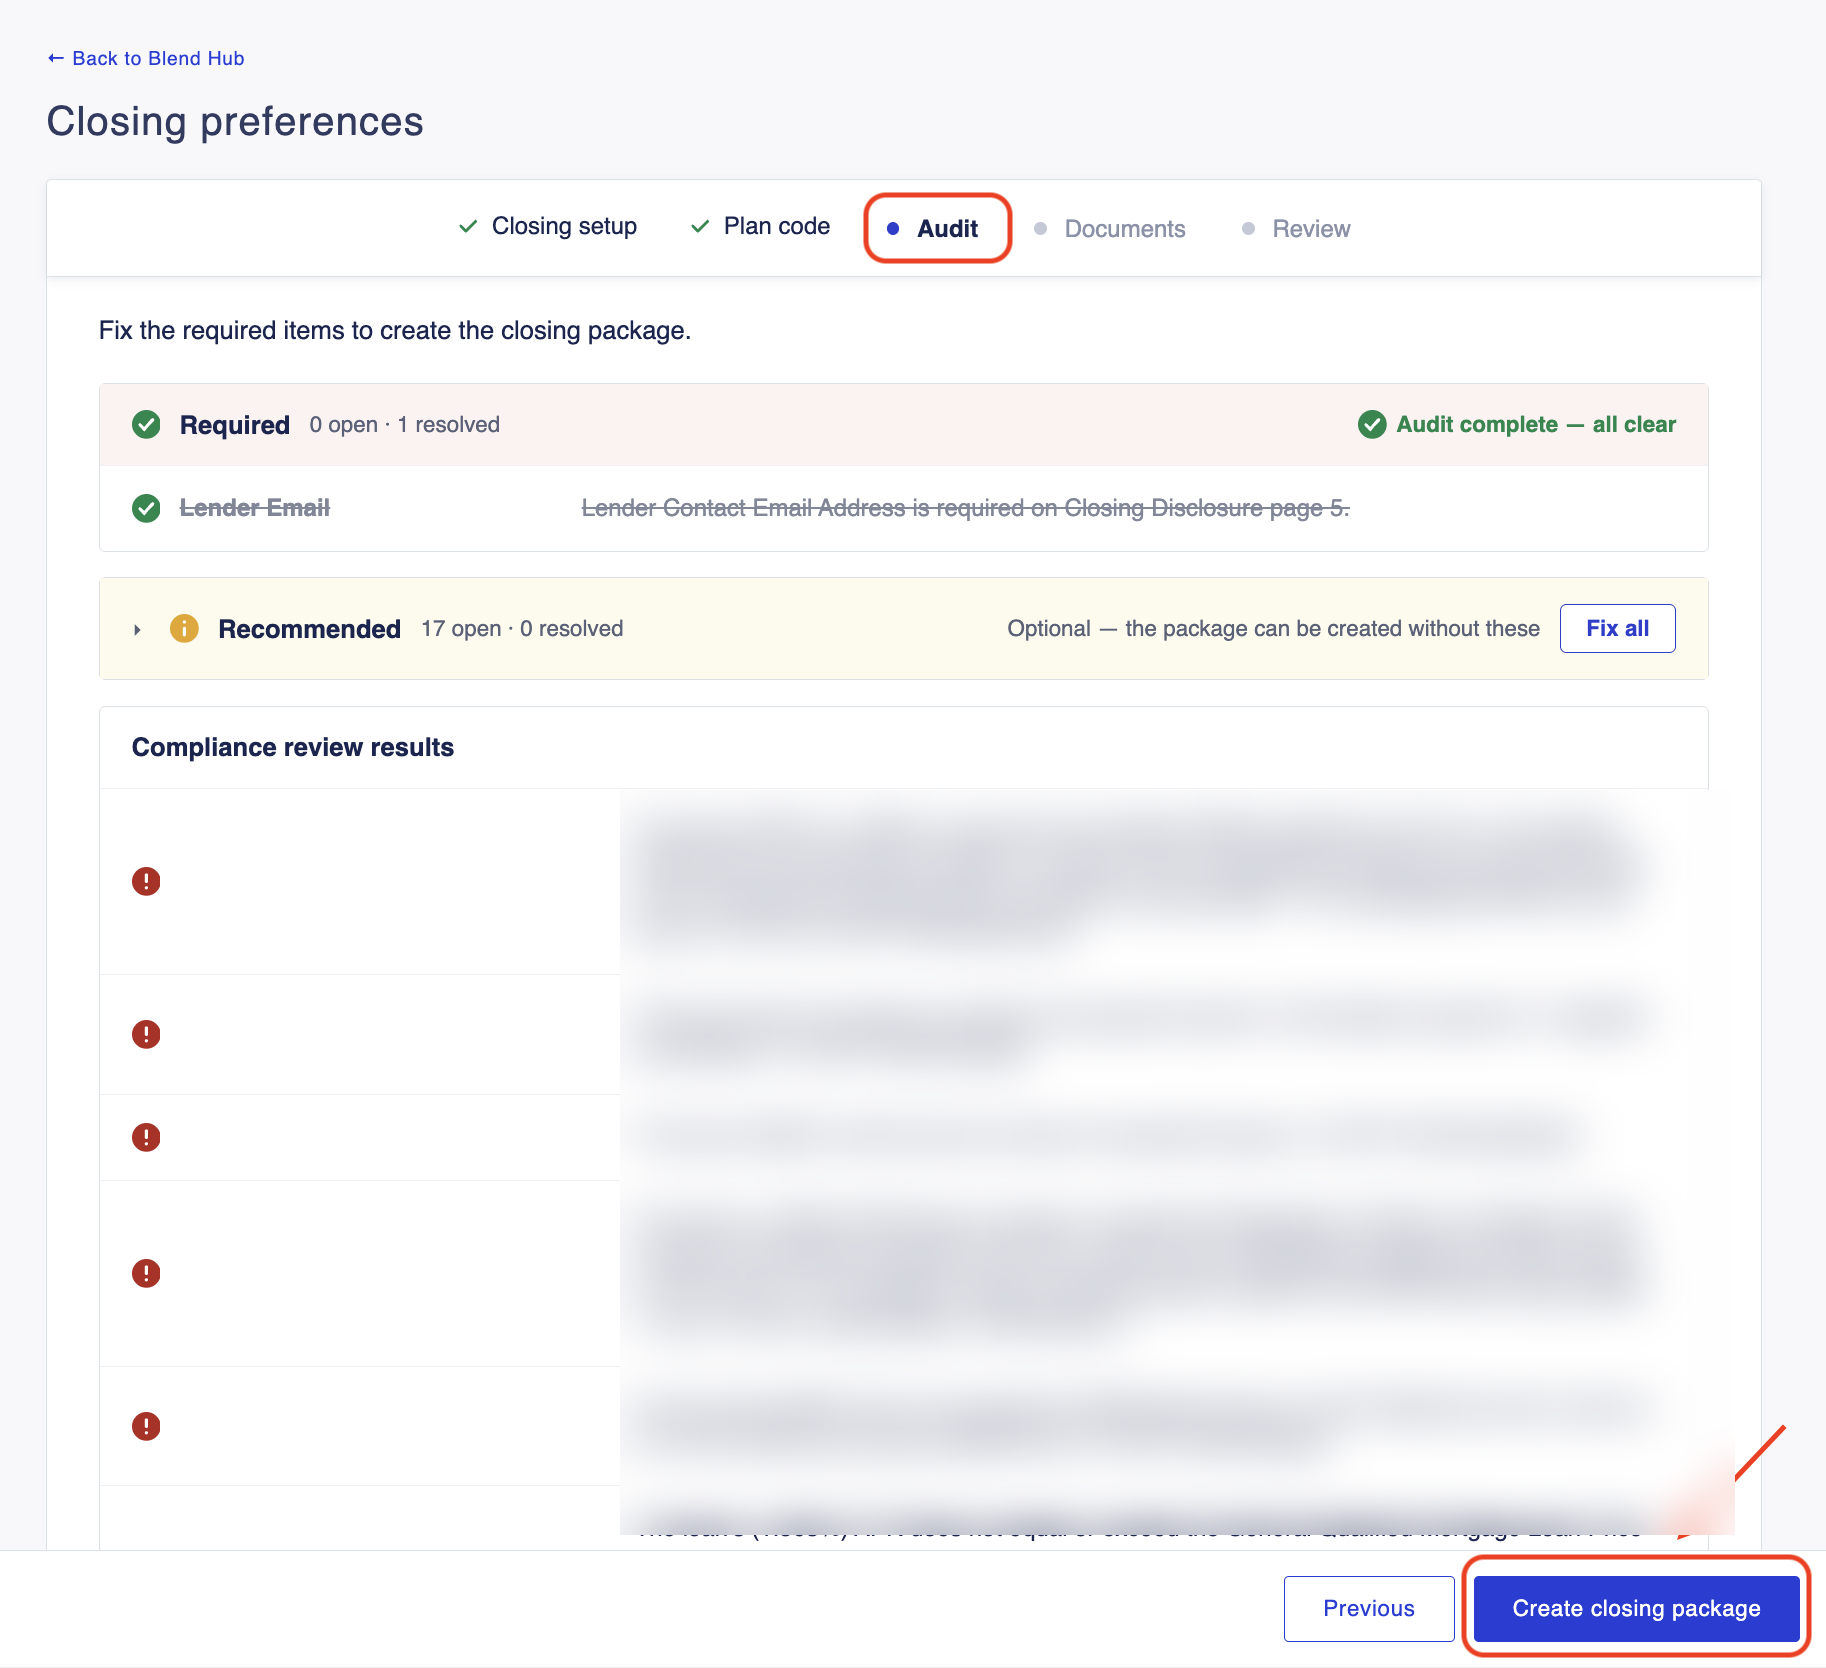
- Run the loan audit in EPC.
- Review every item marked Required and correct missing or invalid information in the appropriate loan or setup fields.
- If Fix All is available, review each proposed change before saving it.
- Continue or rerun the audit and confirm all required blocking items are resolved.
- If a required field cannot be edited or saved, resolve the underlying loan-data or configuration issue before proceeding. Do not bypass required checks.
- When the audit shows Audit complete – all clear, select Create Closing Package.
4. Review documents and signers
Before sending, verify that:
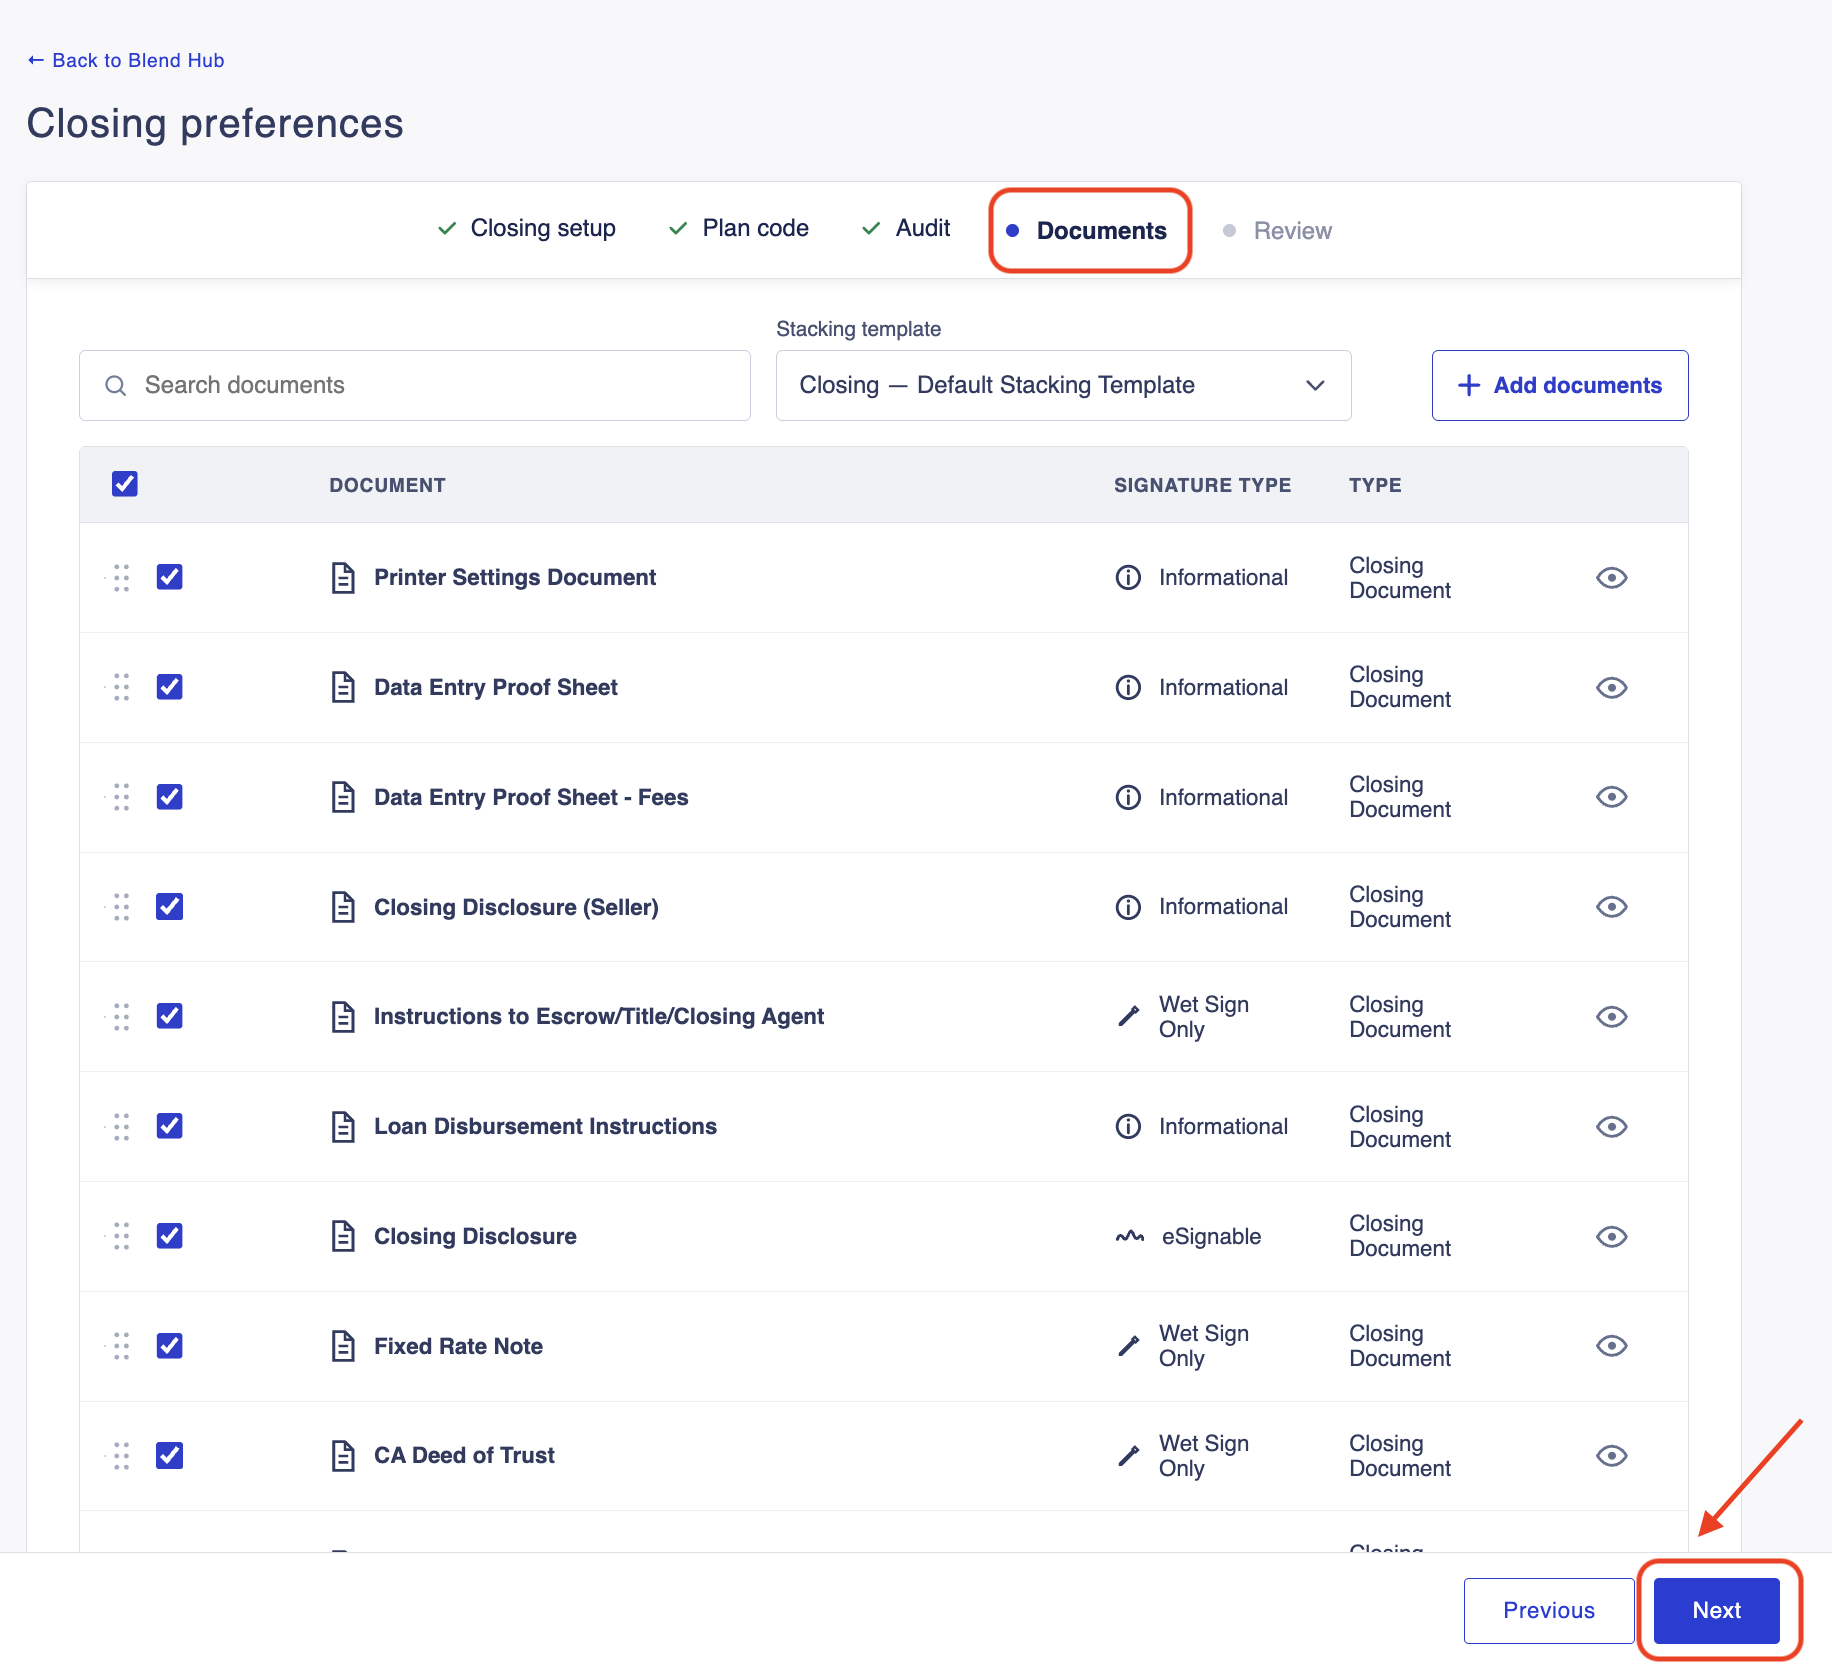
- The document list is complete and accurate.
- Each document has the correct type and signature routing. Add documents only when needed and when Add Documents is available.
- Unintended or duplicate documents are removed or corrected.
- The signer list includes the correct borrowers, settlement agent, and any other required parties.
- Recipient names and email addresses are accurate.
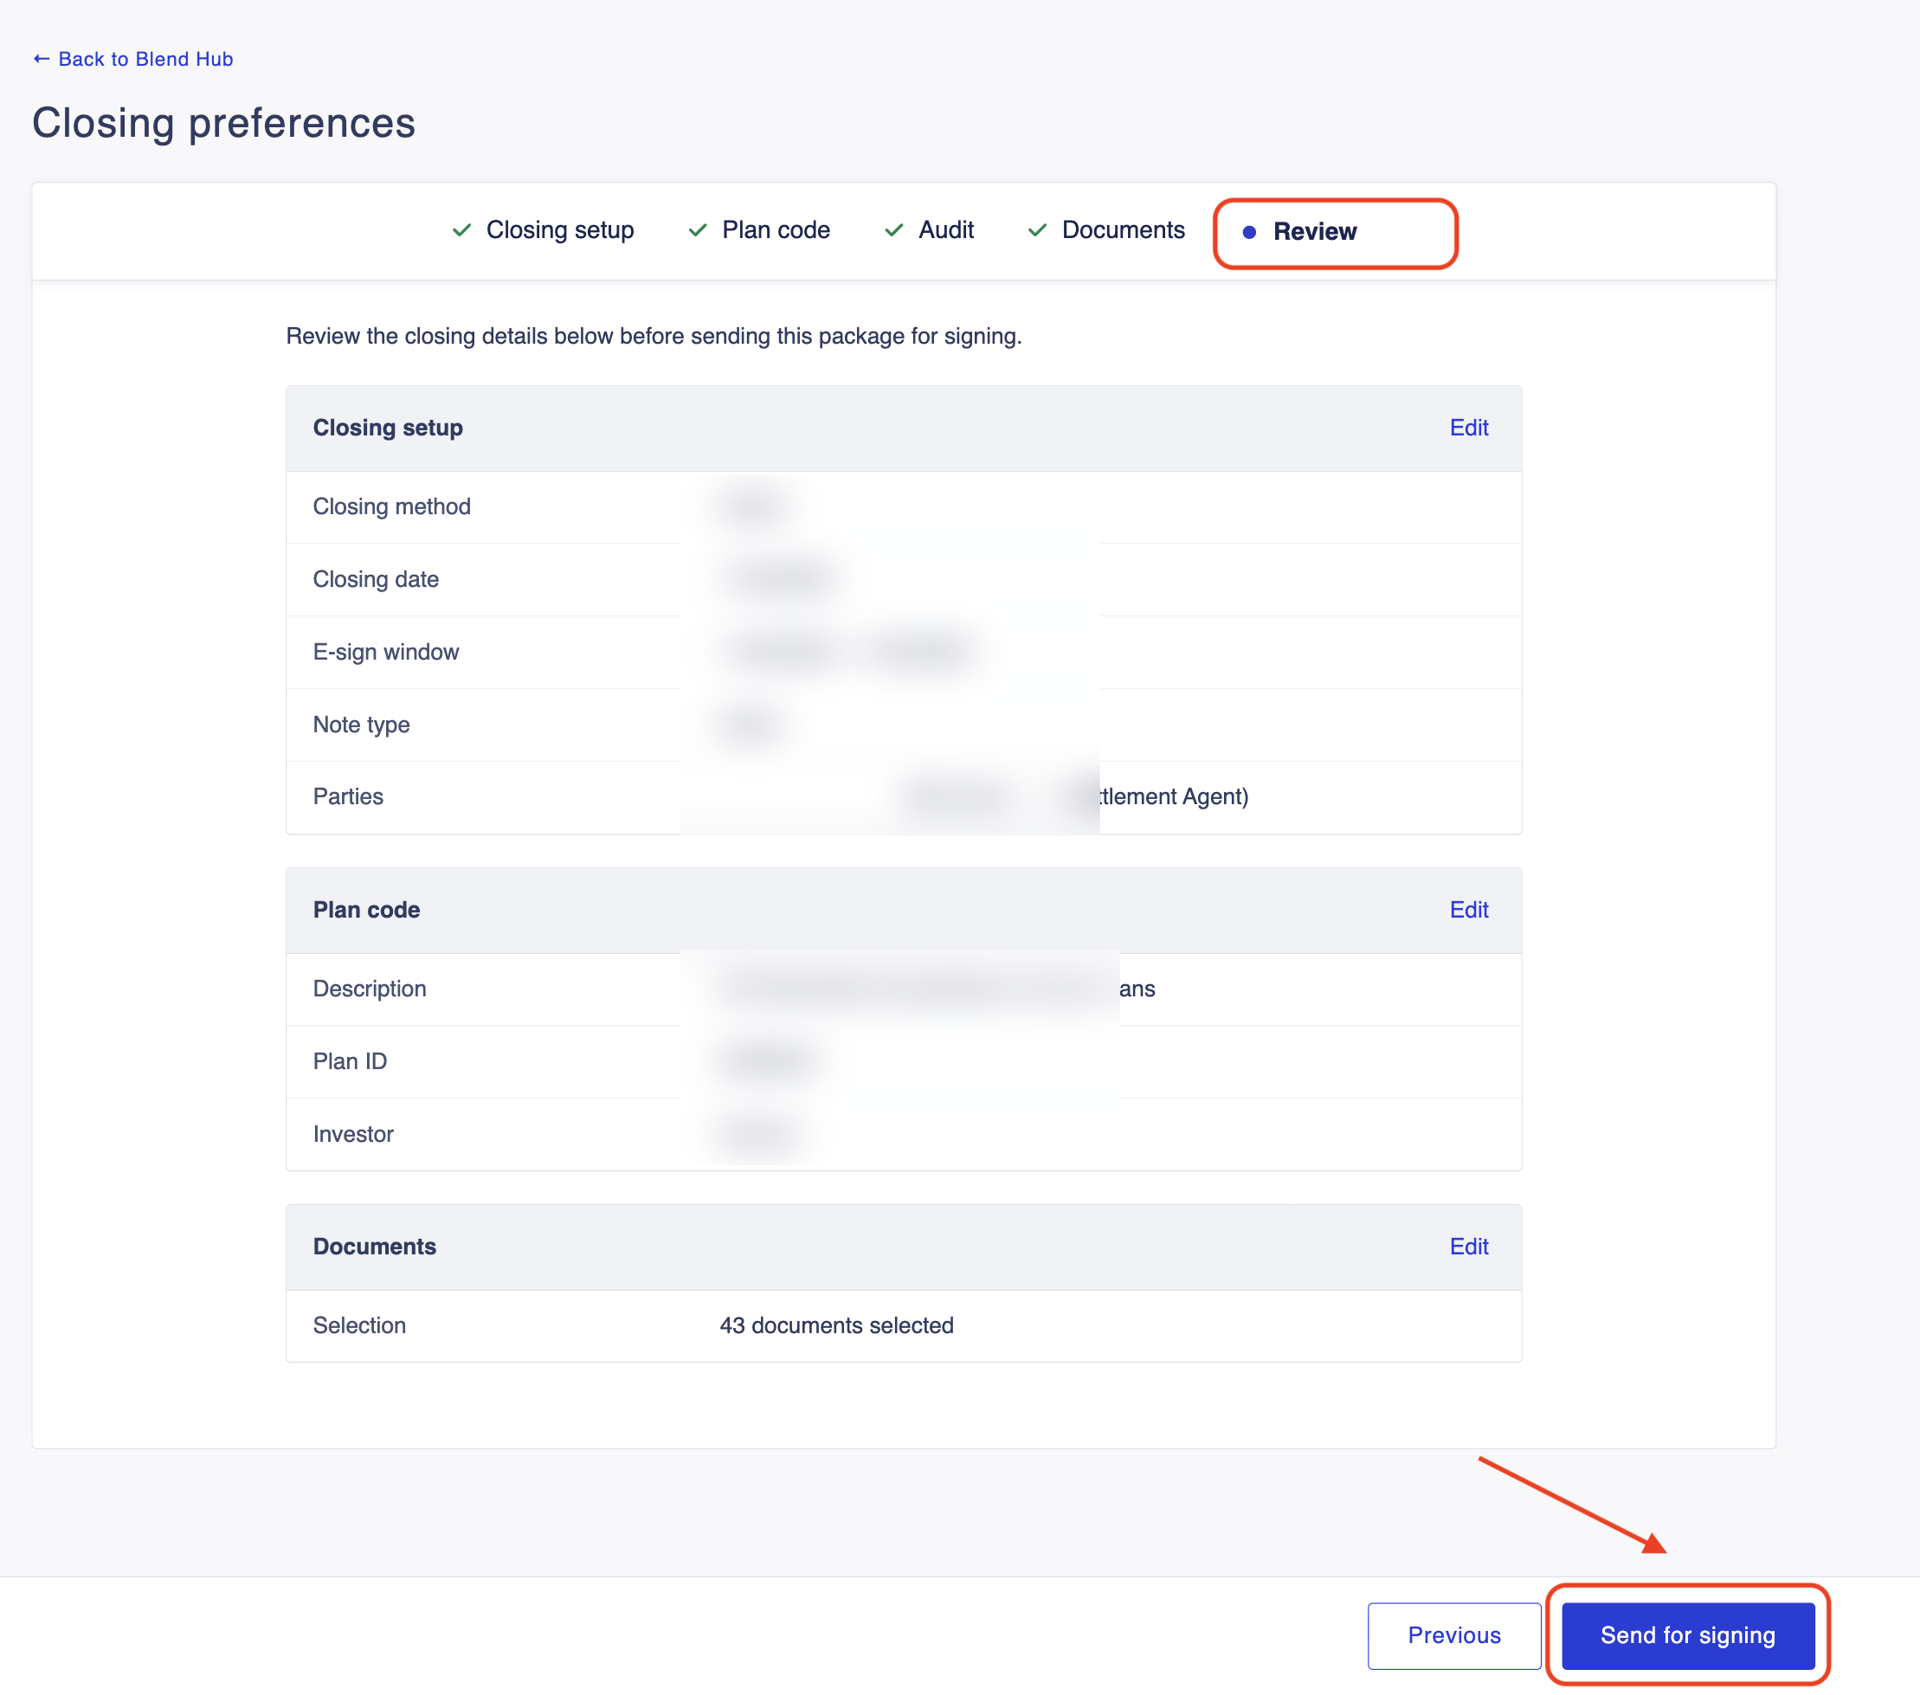
- The package type, closing method, closing date, parties, and document/signature setup are correct in the final order review.
5. Send the package and confirm delivery
- Submit the package using EPC’s send action. The button label may vary by configuration.
- Wait for a success or delivery confirmation.
- Confirm the package appears in the expected Blend closing workflow and is the full Closing Package, not preliminary documents.
If Encompass indicates success but the package does not appear in Blend, avoid resending until you understand the original transaction status. Record the loan identifier, package type, status or error, and transaction ID (if available), then follow please reach out to Blend Close Support at support@blendclose.com for any needed assistance.
Was this article helpful?
That’s Great!
Thank you for your feedback
Sorry! We couldn't be helpful
Thank you for your feedback
Feedback sent
We appreciate your effort and will try to fix the article